Projects

Untitled-design-34.png

How to Make a Wooden Gift Card Holder with a Laser (Step-by-Step)
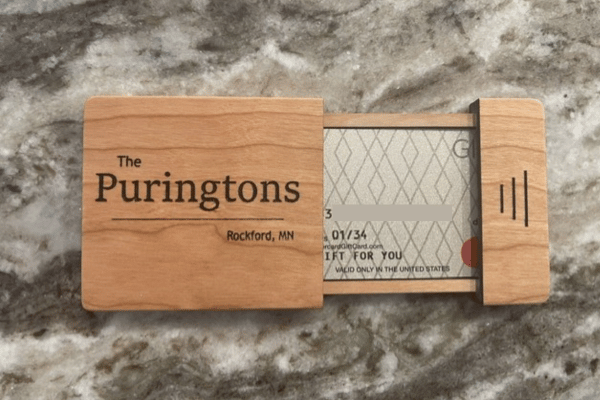
If you search Etsy, you’ll find all kinds of laser-cut gift card holder files. Some are cute, some are well executed—but none of them were quite what I wanted.  I wanted something that would be held on to long after the gift card was used up.  Gift cards can be considered fairly generic and kind of a “meh” gift.  Putting it in a good looking card holder really elevates the gift.  I wasn’t seeing that on Etsy.

I decided to make a gift card holder for some good friends, so I spent a little time designing my own file in LightBurn.

Another thing I noticed: most designs use 3mm plywood. I wanted something better—so I made mine from solid wood instead. It costs a bit more, but the durability and finish are worth it. Thin plywood designs can be fragile, especially around small details.

After a few iterations (and a couple of mistakes), version 4 finally came together.

Build a quality gift card holder

Design Process And Adjustments

I started by cutting a test version from standard 3mm plywood. The concept worked, but I needed to tweak the dimensions.

Next, I cut one from 3mm maple, which turned out great—until my laptop battery died halfway through engraving my friend’s name. Lesson learned.

That setback gave me the chance to improve the design:

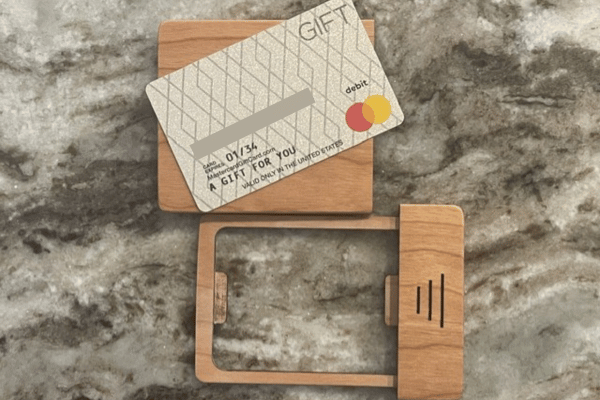
  • Tightened the card pocket for a better fit
  • Added a small tab to help hold the card in place
  • Switched the name layout to horizontal
  • Rounded the lid alignment tab for smoother operation

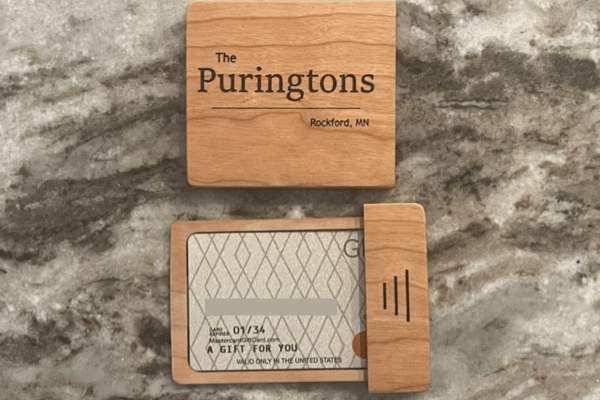
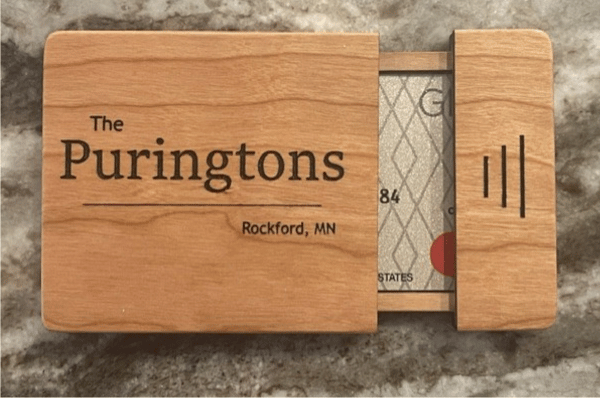
I engraved the name after assembly by carefully positioning the holder in the laser. I masked the area, engraved it, then used clear and black paint to make the lettering pop.

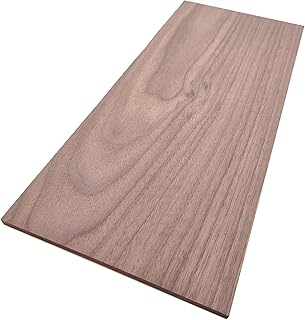
Another thing I noticed: most designs use 3mm plywood. I wanted something better—so I made mine from solid wood instead. It costs a bit more, but the durability and finish are worth it. Thin plywood designs can be fragile, especially around small details.  Amazon has a nice variety of solid 1/” (3mm) solid wood to choose from.

After a few iterations (and a couple of mistakes), version 4 finally came together.


Solid 3mm Wood
Solid Wood

On Amazon

Solid Wood

On Amazon

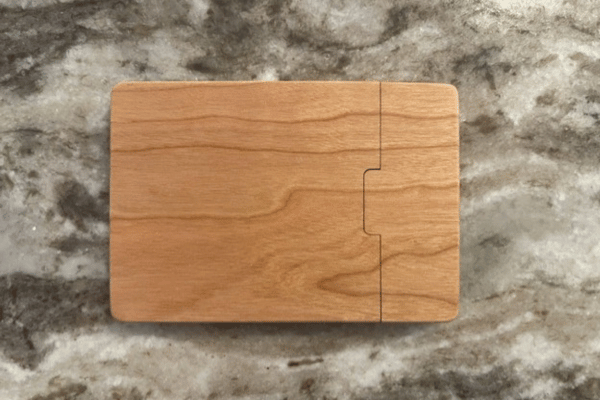
Solid Cherry Gift Card Box

Assembly Tips

This isn’t a project you want to rush. Take your time aligning everything during glue-up.

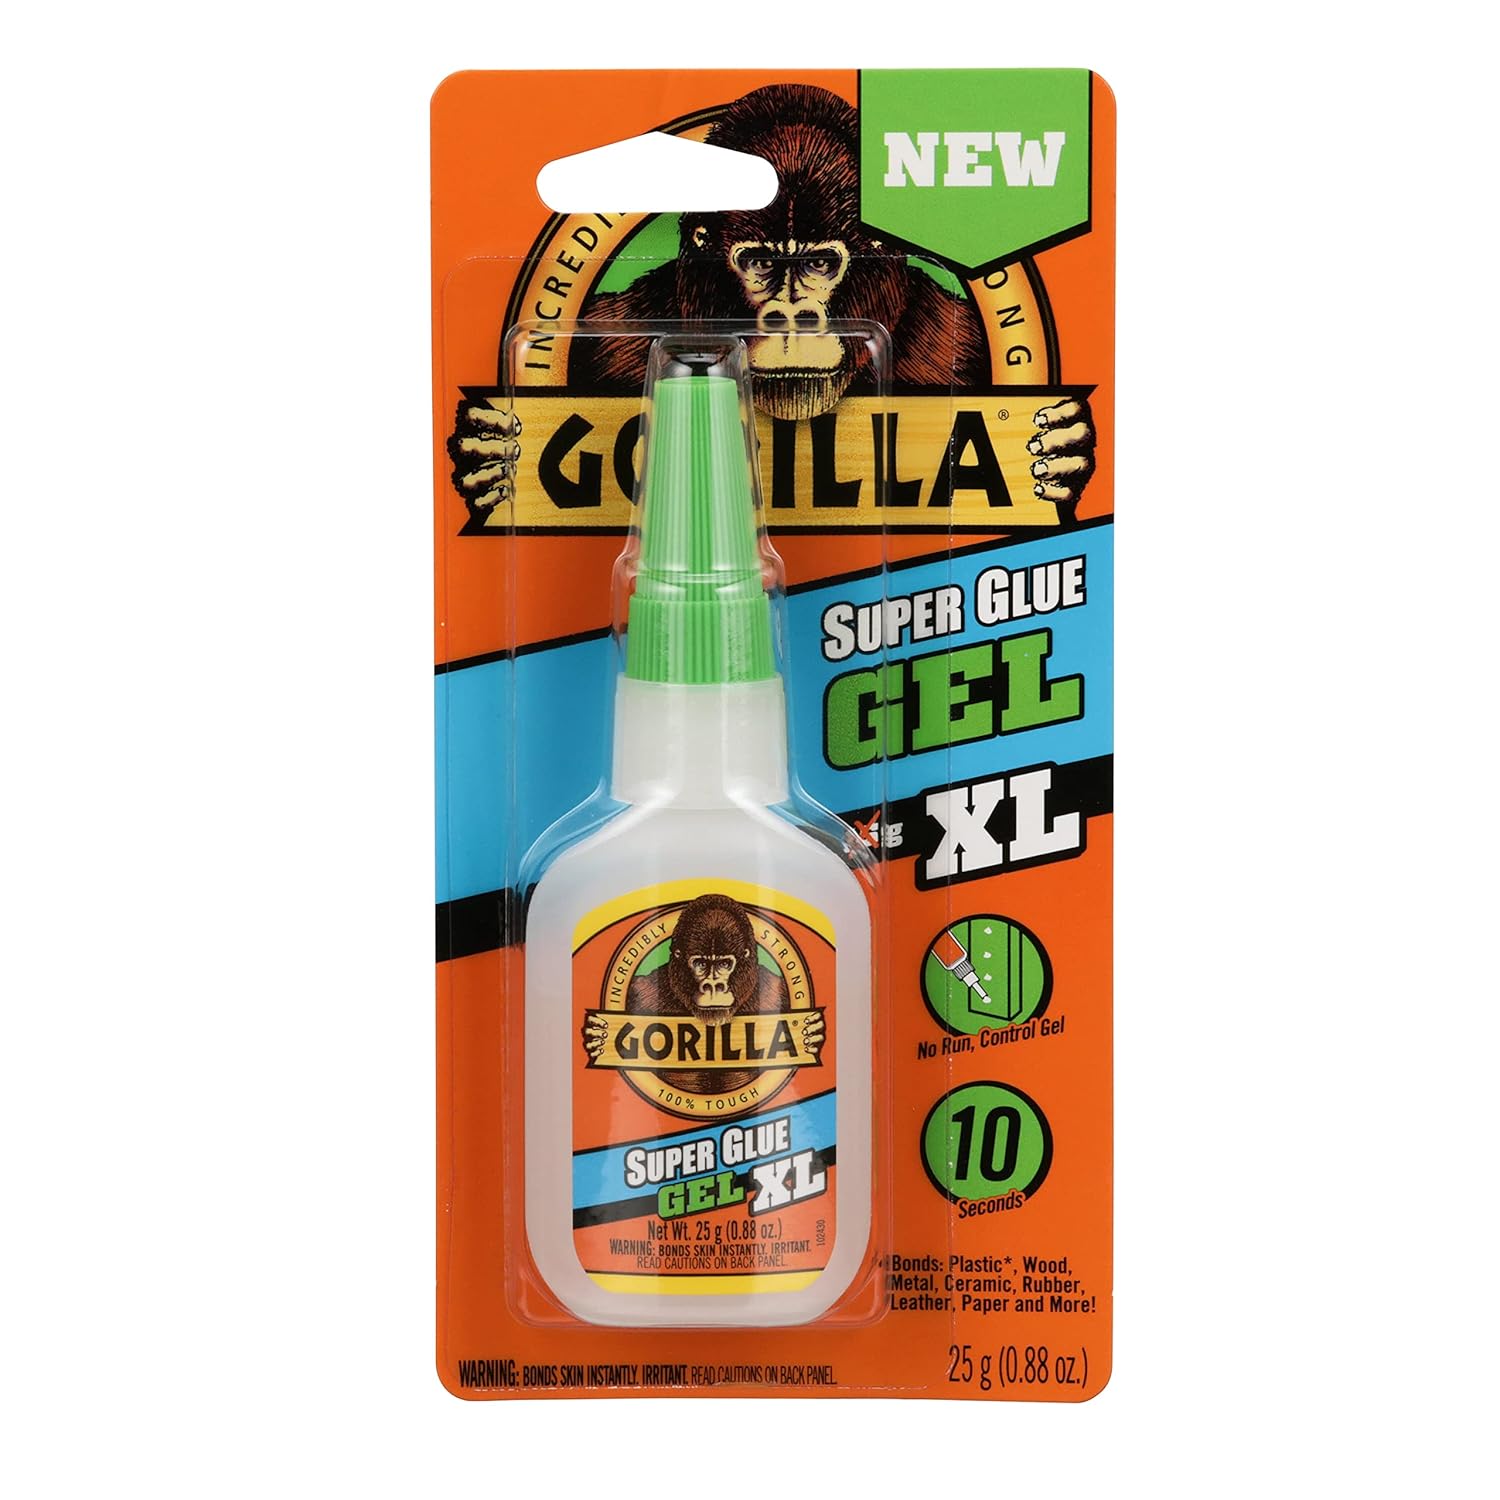
I recommend Gorilla Glue Gel Super Glue—it gives enough working time to position the parts accurately.

Once assembled:

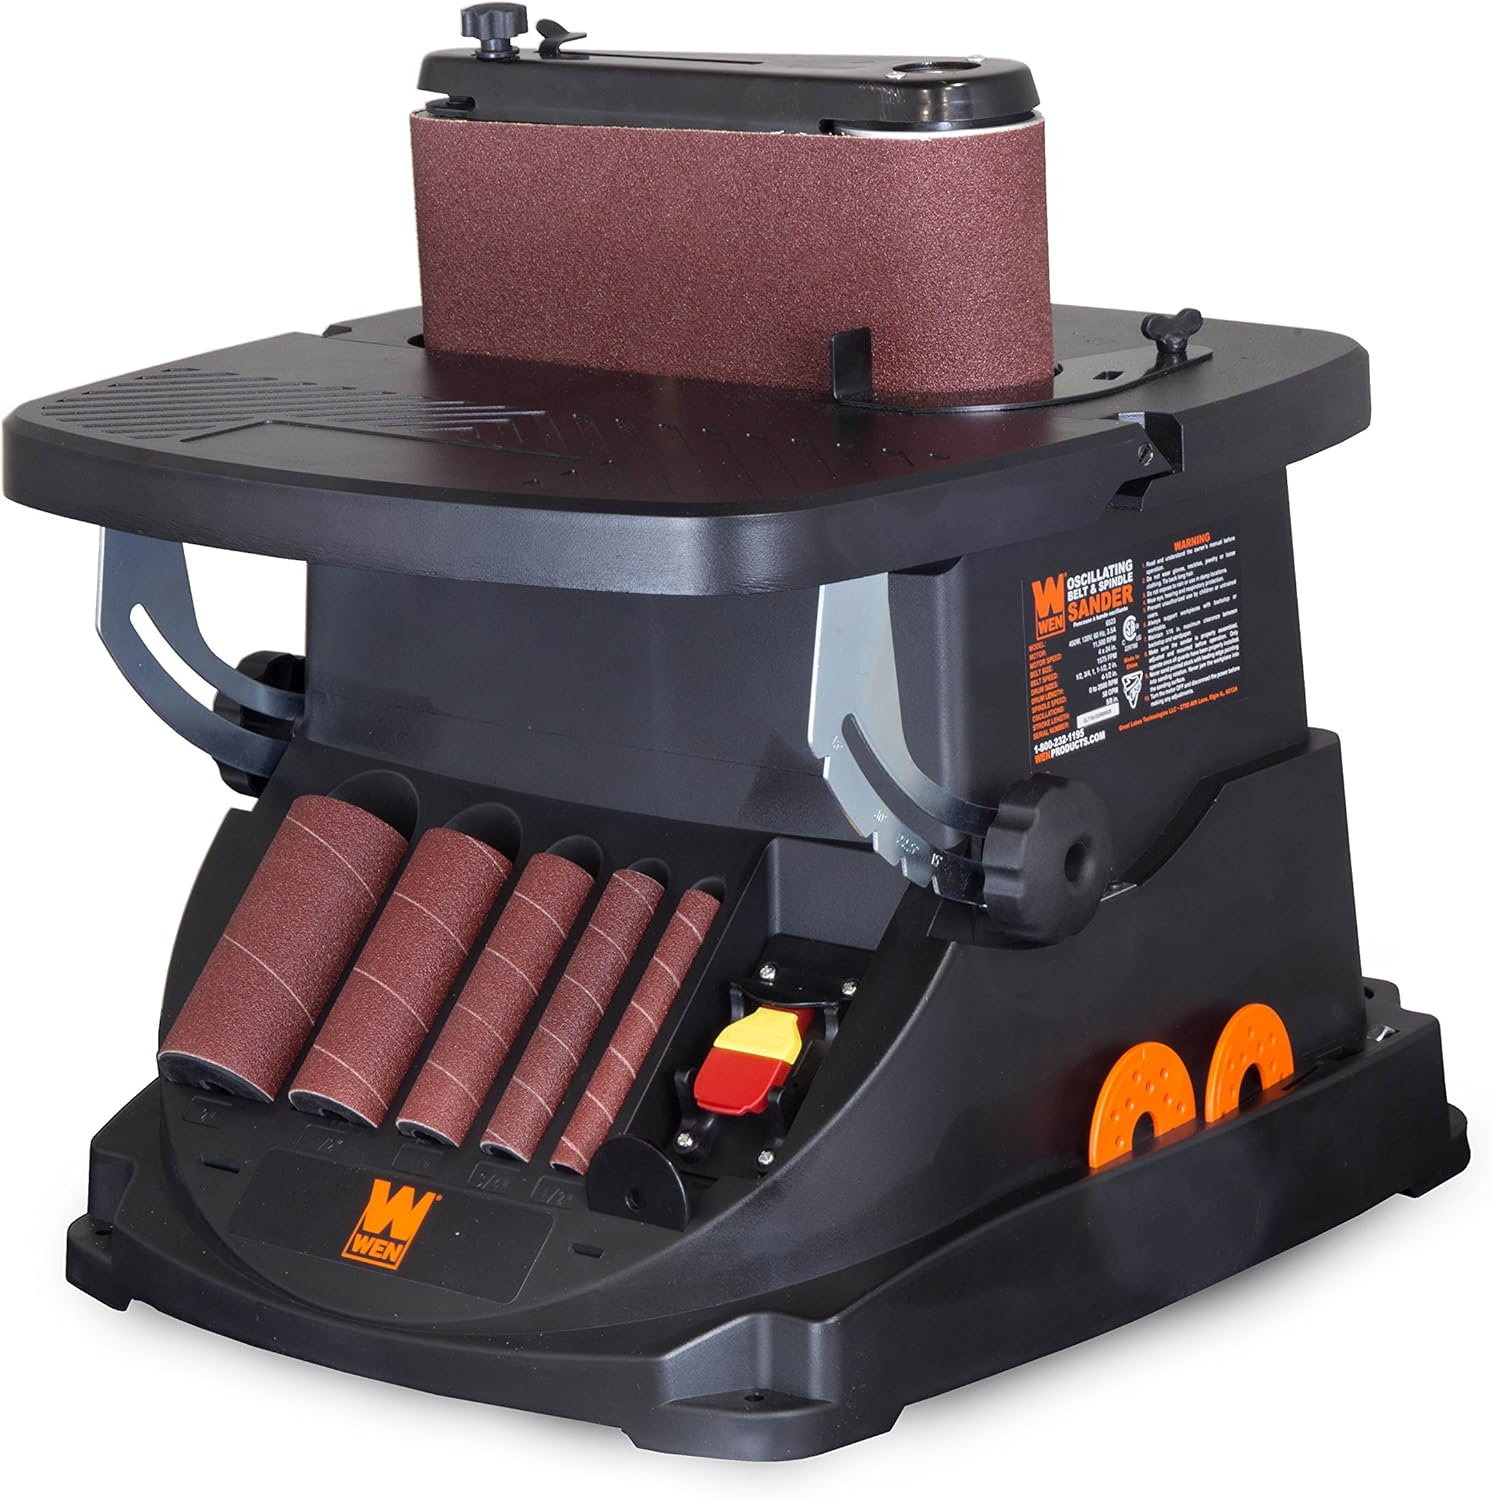
  • Sand the edges flush (a belt sander helps a lot)
  • Round over edges for a smoother feel
  • Fine-tune the card tray fit by hand sanding

Finishing

For finishing, I’ve had great results with:

  • Butcher block oil (natural look, shown in photos)
  • Satin clear spray (for a more polished finish)

If you choose a spray finish:

  • Apply thin coats
  • Sand lightly between coats
  • I prefer a satin

Tools & Materials

Laser
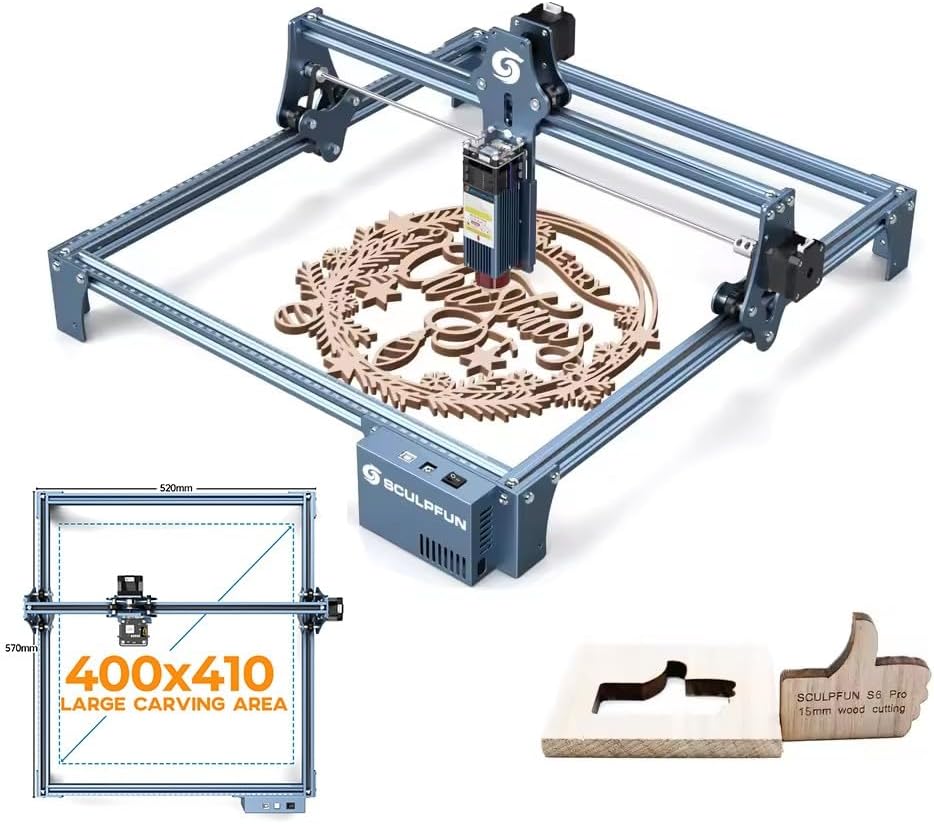
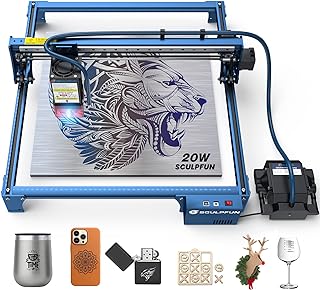
I use a 20W Sculpfun 20W Laser Engraver, but anything capable of cutting 3mm solid wood will work.

Design Software
Light Burn is what I used to create the file.

Wood
3mm solid lumber—cherry is my favorite by far.  Walnut nice as well.

Glue

I like Gorilla Glue Gel.

Sandpaper
Various grits (up to 320 for final sanding)

Belt Sander (Optional)
A small WEN belt sander makes edge work much faster.

Masking Tape & Paint
Used to enhance engraved text.

Finish
Butcher block oil or satin clear spray

Get What You Need On Amazon

Sculpfun Laser

Shop Sculpfun

Solid 3mm Wood

Shop Solid Wood

Wen Belt Sander

Wen Belt Sanders

Shop Gorilla Glue

Final Thoughts
This project was genuinely fun to build. The finished piece has a satisfying open-and-close action—it almost feels like a fidget toy.

Honestly, I didn’t want to give it away.


thumbnail_IMG_3038.jpg

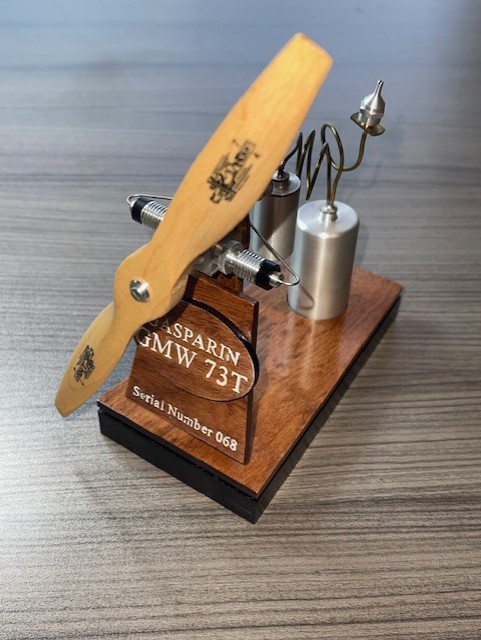
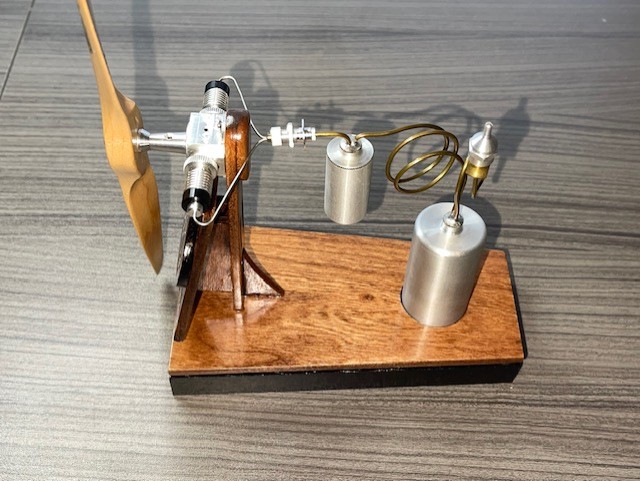
I have always been intrigued by Co2 model airplane engines.  Always looking for a new piece for my collection, I picked up a Gasparin GMW 73T twin engine on ebay.  It was in great shape and never been run.  You don’t see many old Co2 model airplane engines come up on ebay and I am not sure if anyone makes them new any longer.  At any given time you may will find one here and there.  I am no expert on them and you have to dig a little to find info but what I do know is this little Gasparin Co2 engine is a work of art and I wanted to display it.  Below is some basic info on a little stand I built.  I am not sure on the prop choice yet but for now I have 7 x 4 prop mounted.

Right Now on eBay Co2 Model Airplane Engine
Clicking a link to eBay may result in a referral commission being paid if a purchase is made.

Loading…

Laying Out The Engine Mount

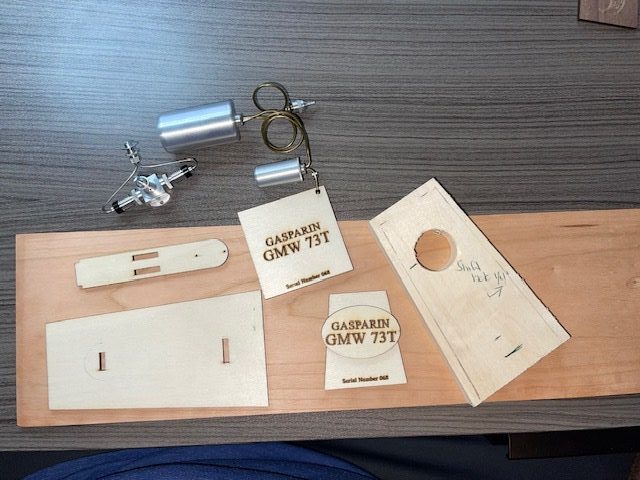
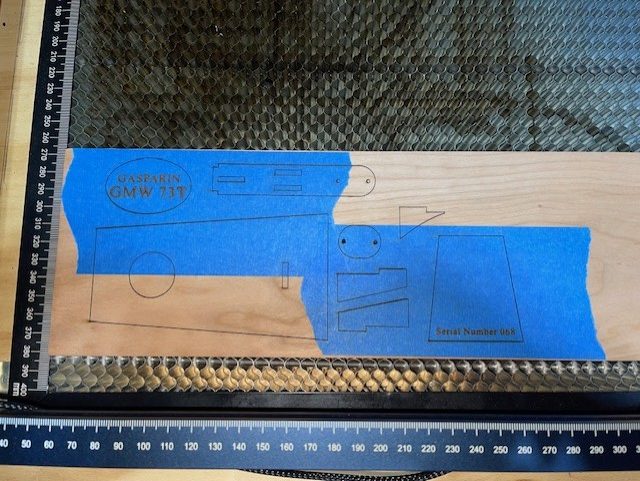
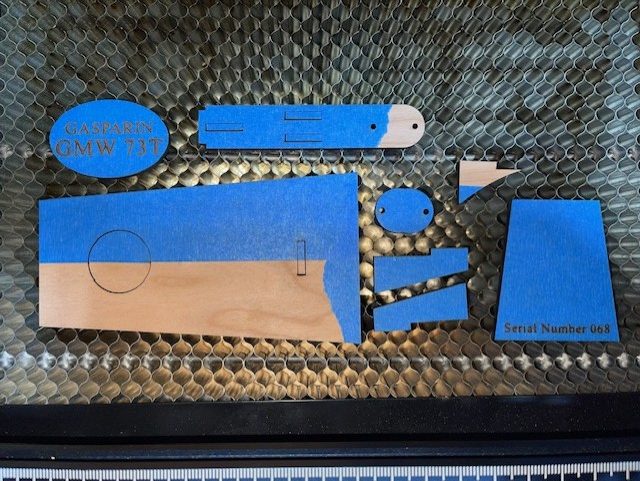
So I spent a little time looking at other model airplane display mounts and got a few ideas.  Then I started laying out, sketching, cutting out patterns to see how things would fit and finally had an idea of what I wanted.  I drew the parts out in light burn and cut out the basic shapes out of cheap plywood to see how everything would fit and look.  The nice thing about cutting out parts with the laser is I could cut a variety of shapes for different pieces like the ID plaque and see how everything looked.  Once I was satisfied with the look, I cut out the parts I wanted out of 1/8″ solid cherry.  The base is 1/2″ walnut that I had laying around.  The grain was nice and tight and took the black paint nicely.  

Layout Of Co2 Engine Mount

Cutting & Finishing The Engine Mount For The Gasparin Co2

As mentioned, the parts were cut out of 1/8″ solid cherry with my laser.  (You can find good quality solid wood on Amazon here) The base was just cut and sanded with my miter saw.  I also cut a piece of 1/16″ plywood about 2mm smaller than the shape of the base to set the top off the bottom just a bit.  I covered the areas of the ID tag that would be engraved with masking tape.  After they cut, I shot the ID parts with a clear coat to seal the tape and then shot it with the white to fill the letters.  Not perfect but not bad and make the engraving stand out.  I usually like to prefer the natural look of cherry with just a clear coat but I decided on a mahogany stain as a better contrast to the base.  The base is satin black.  I used double sided tape to hold the fuel tank down.  

Gasparin Co2 Engine & Mount Project Thoughts
I was very happy with how the mount for the Gasparin GMW73T Co2 engine turned out.  As mentioned earlier, I am not sure on the prop yet.  I hope to have a video of the engine running up soon.  I am always looking for cool little projects that I combines my love of creating with my other interests like model airplanes.  I also love it when I can utilize my laser in the project.  Right now I use a simple Sculpfun 20 watt Pro Max laser. Here is a link to another project that I made with the laser that has a little info on the laser, the wood etc.  Amazon is  a good source for solid cherry for your projects.  They also offer the lasers and some other accessories for using them that will help you out.


Here’s a simple little jig I burned on my Sculpfun laser for aligning wing ribs.  I made these from standard 3mm plywood.  They are approximately 1-1/2″ long by 3/8″ wide.  The slot for the ribs is .79mm that seems to work well for 1/32″ balsa ribs.  I have used them on 1/16″ balsa but I think I will make some with a bigger slot.  The pin holes are 1mm.  I made two to keep the ribs from pivoting.  These little wing rib jigs work well to keep the ribs at a right angle to the work surface and make it easy to lock the ribs in place when you are gluing.  If you  are using CA glue, make sure not to get carried away or you will have the jig permanently mounted to your rib!  These are super easy to draw in Lightburn and  for me the work great!  The wing in the video is for a Sterling peanut scale Fokker D-8.  All though this isn’t a laser cut kit, it was very relaxing to cut out the pieces.  Having the wing rib jigs kept everything nice and true.

Right Now on eBay Peanut Scale Kits
Clicking a link to eBay may result in a referral commission being paid if a purchase is made.

Loading…


The Lego Technic McLaren (set #42172) is an awesome build!  Here is a cool little overview of the set.  You can find it here along with some cool accessories like lighting kits and display cases.  We bought this for our son who is usually a big Star Wars Lego builder.  He has built a few very big kits, but the Lego McLaren P1 was just another level completely.  You can see more specific details below.  What stood out in my mind is the transmission and a real differential!


Right Now on eBay Lego Technic McLaren P1
Clicking a link to eBay may result in a referral commission being paid if a purchase is made.

Loading…

LEGO Technic McLaren P1 (Set 42172) – Key Features and Insights

Build Experience
The build time is approximately 25 hours, which includes some reworking. (Your time may obviously vary) If you think about the fun-per-hour value, it’s definitely worth it! The set offers a highly immersive experience, including constructing a transmission and a differential rear end.

Model Details

  • Scale: 1:8
  • Pieces: 3,893
  • Dimensions 20.55 x 14.88 x 9.06 inches

    This set is recommended for adult builders and car enthusiasts seeking a challenging, realistic project.


thumbnail_IMG_1868.jpg

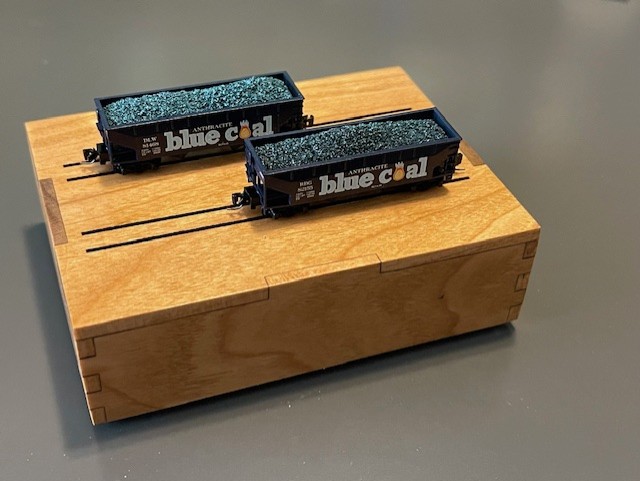
William Dean Wright makes a great product for z scale with his Full Throttle line of wonderfully detailed freight cars.  If you are into z z scale you know doubt have some of his cars.  While his offerings are known to have great detail and interesting subjects, they are also very well know for their plastic cases with wonderful artwork and details.  They are also very collectible and many sell out immediately!  I know, I was a dealer for him for about 6 years.  So here is a little project I made with my Sculpfun laser that you may want to take a look at.

Full Throttle Z Scale Display Cover

Z Scale Full Throttle Display

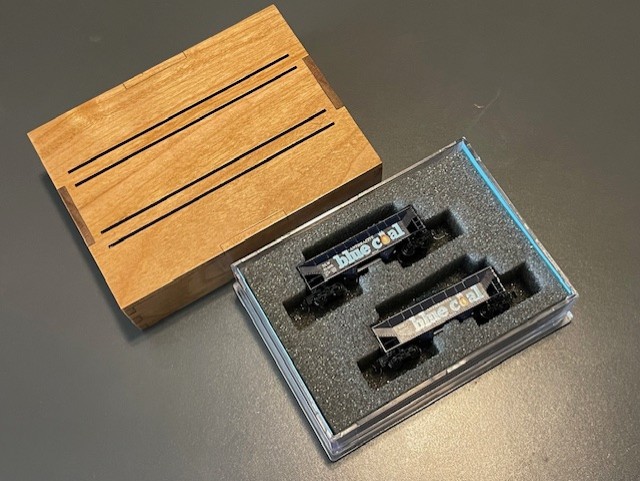
While the hard case and the artwork for the Full Throttle is awesome, I wanted to show off my Blue Coal hopper set a little more.  I also have been messing around with my new laser cutter and needed another project to hone my skills.  So I  laid out a box in my software (Lightburn) and burned a little box.  I made the top out of 1/8″ solid cherry and made a bottom for the box out of plywood.  I added a couple of engraved lines to serve as track to hold the cars in place.  My first one was pretty good but I didn’t like the spacing of the rails so brought them closer together.  I also decided just to make the top and slide it over the plastic base.  I still have the file for the bottom if I want to go that way.

Right Now on eBay Z Scale Full Throttle On Ebay
Clicking a link to eBay may result in a referral commission being paid if a purchase is made.

Loading…


About The Box

The box top is quite simple and easy to design.  I used 1/8″ solid cherry.  For this type of project, solid wood looks so much nicer than plywood.  I would recommend having a inexpensive calipers to measure you wood and then adjust the size of your tabs to reduce sanding.  My would measured out at 3.4 mm and I set my tabs at 3.5 mm, I will likely bump them up a little more.  It’s easier to sand the tabs down than sanding the sides down to meet the tabs.  I used a medium CA but you could use wood clue and clamps if you prefer. I used a simple gloss clear coat finish that I sanded in between for a great finish.

Full Throttle Display Cover

What I Used & My Laser Settings

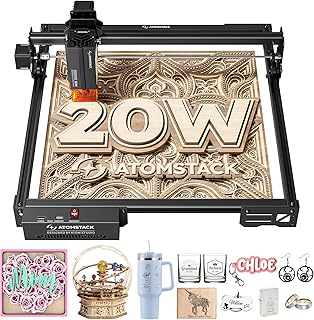
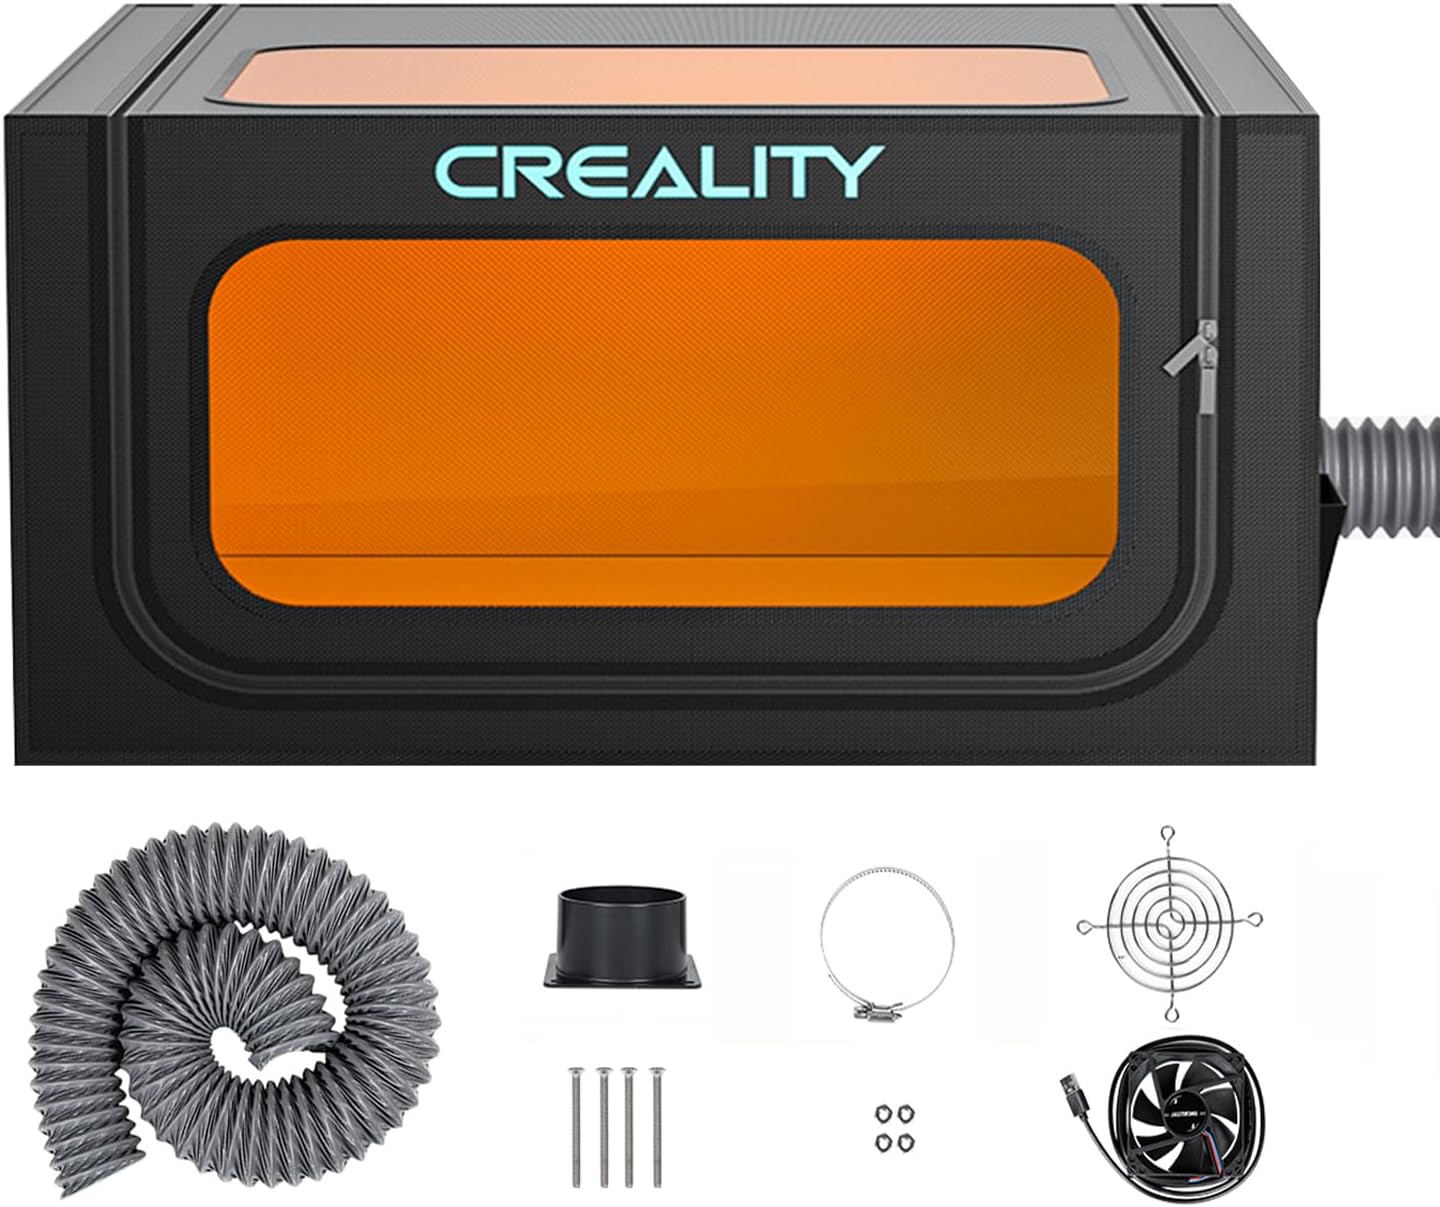
My laser is a Sculpfun S30 Pro Max with air assist.  I have a Creality hood with a fan to keep the smoke contained and move it out.  I have just a cheap calipers for measuring the wood.  The solid cherry I bought from Amazon.  Walnut, maple, oak and other woods are also available on Amazon.  My speed for the cut was 600mm and the power was 85% with 2 passes.  For the engrave I went at 6,000mm and 85%, but I later dropped the engrave power to 65% which gave me less of sap burn affect.  Keep in mind these were my settings!  Run test patterns with your laser for best results.

Lasers & Supplies On Amazon

Solid 3mm Wood


thumbnail_IMG_1844.jpg

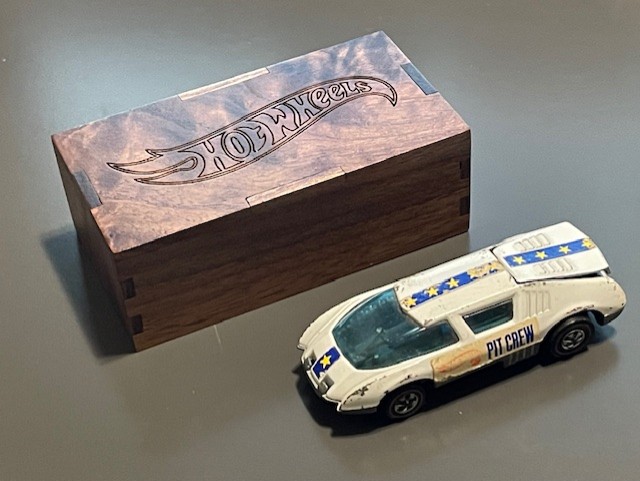
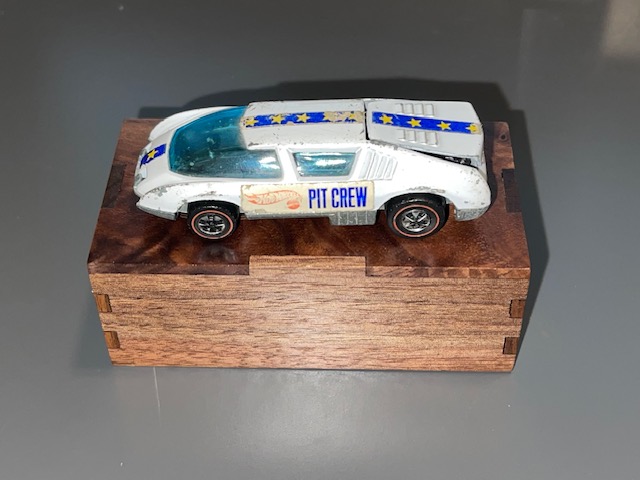
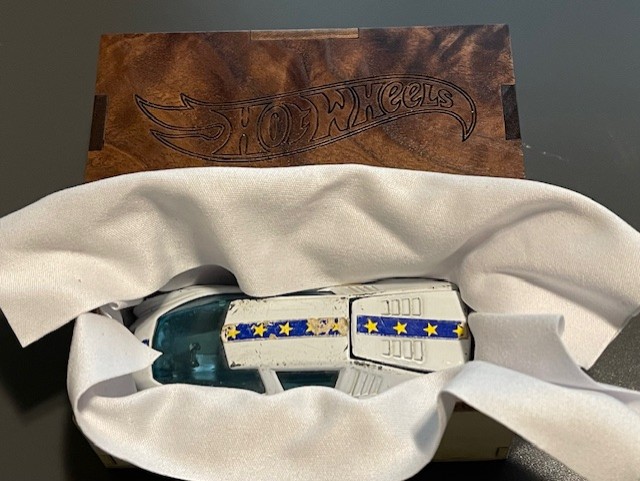
This little Hot Wheels gift box taught me more basics about laser cutting and engraving.  It also helped me learn a little more about Lightburn software.  It also taught me that I need to slow down, measure twice and cut once.  Something I still hear ringing in my ears form my high school shop teacher.  It’s a simple design that fit’s a good share of Hot Wheel cars.  I took a picture of it with my battle worn Pit Crew.  You could easily make the design a little bigger to fit your needs or even double or triple it.

Right Now on eBay Vintage Redline Hot Wheels
Clicking a link to eBay may result in a referral commission being paid if a purchase is made.

Loading…

About The Hot Wheel Gift Box

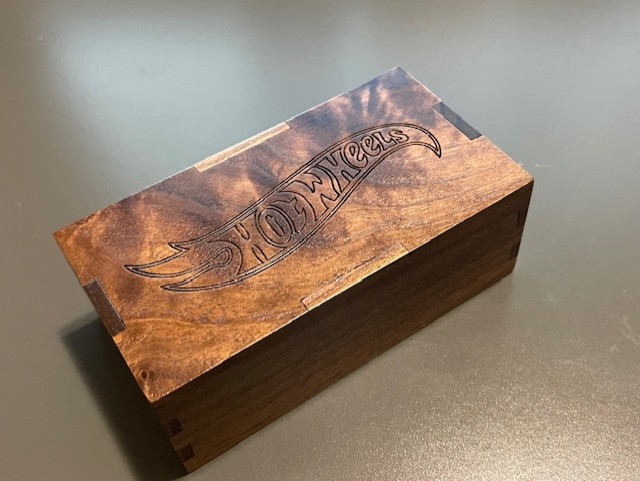
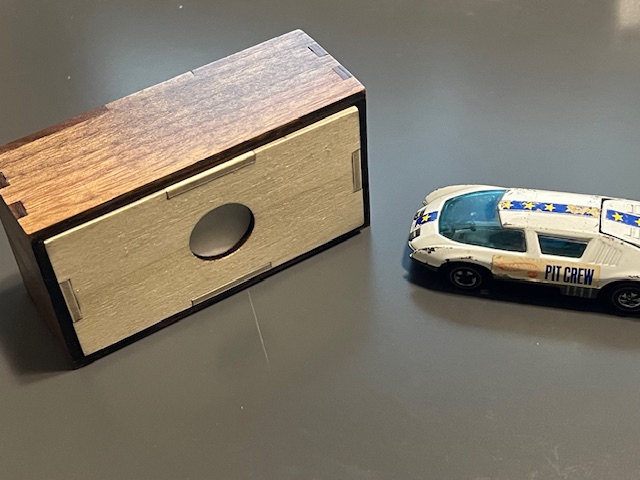
As mentioned above, this is a simple box but is just a little cooler for a gift box when you call it a Hot Wheels gift box!  The bottom of the box is 1/8″ light ply with finger joints.  I also added a 3/4″ hole to make it easy to slide the top off.  The top is 1/8″ solid walnut.  I prefer solid wood as it just look nicer than a plywood box.  I burned in the Hot Wheels logo for my personal use.  I wouldn’t include it in a file or for sale.  I don’t want Barbie coming after me.  The finish is a simple rust o leum clear coat semi gloss.  Give it a couple of light coats and then sand with 320 before a final coat.  It comes out so nice!  I used a lens cleaner cloth to wrap the car in.  Outside dimensions of the box are 3-3/4″ x 2″ by about 1-3/8″.  Again as mentioned before get a cheap calipers to measure the thickness of the solid wood top, it will make your sanding much easier!   If you want to contact me at jrk7841@msn.com, I can try to send you the Lightburn file, less the logo of coarse!

What I Use

I use a Sculpfun 20 Watt with air assist.  For me, the price point and power matched up nicely.  I added a Creality cover and cutting platform.  Calipers are a must.  Amazon has a nice selection of 1/8″ lumber available as well. I like the Lightburn more and more as I use it but I know XTool has their own software that is getting good feedback as well.

Get Price On Amazon

Solid 3mm Wood

1/8“ Solid Wood On Amazon


thumbnail_IMG_1800-1-1-e1728005845454.jpg

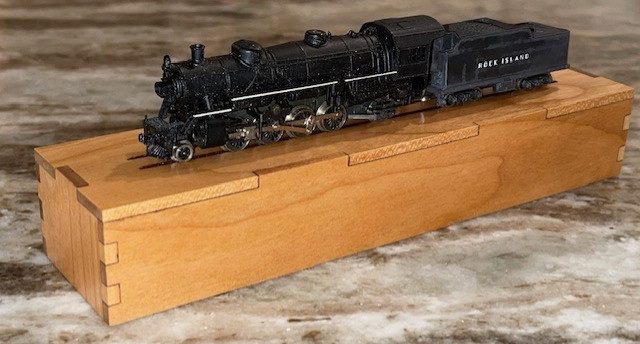
Here is a simple little project that I made using my Sculpfun S30 PRO MAX Laser.  It’s a simple design that allows me to display an old Atlas N Scale 2-8-2 Mikado Locomotive.  It could certainly be used for other locomotives as well.  Below I will give an overview of the experience.  I am relatively new at laser work and so I hope some of the info will help you along the way. The project helped me learn a few tricks with the laser in both layout and settings.

A Little Bit About The Box

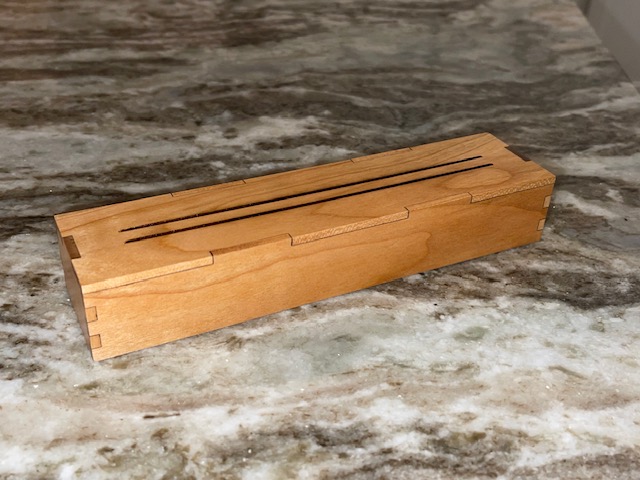
The box itself is of a fairly straight forward design laid out using Lightburn.  If you have a laser engraver, you probably own Lighturn or equivalent software.  The box top is solid cherry, not plywood.  Solid wood may be a little more inconsistent in thickness and a little more money but the look is so much nicer.  The bottom is just a standard cheap hobby plywood.  Both where bought as 3mm but actual thickness varied.  More on that a little later, it does make a difference in layout.  The goal was basically to recreate a plastic jewelers case that Atlas used for many years for their n scale locomotives in wood.  My goal was to utilize the plastic tray inside the jewelers case inside my wooden case.  So with careful measuring and adjusting, I was able to get the bottom sized correctly.  From there I created the top to slide over the wood bottom.  If you have a plastic case bottom, I imagine you could just use that for the bottom.  If you don’t have plastic tray insert, you could just wrap the locomotive in soft cloth for storage.  I added a couple of engraved grooves in the top to serve as rails to display the locomotive.

N Scale Locomotive Storage And Display Box

Materials Used

I had been using walnut on a few projects but on this one I decided to use cherry.  I am really pleased how the wood finished out.  With the clear coat, it really has a classic look.  The cover is 1/8″ or 3 mm cherry from Amazon.  The wood actually measured out at 3.4 mm (but a cheap caliper!) so I made my tabs at 3.mm which proved just about perfect.  I may increase to 3.6 mm as I would rather have the tabs a little tall and then sand down.  The bottom of the box was just made from standard project ply at 3 mm.  It measured out a little shy of that, I made the tabs at 3.01 mm.  The light ply sands very easy so not a big deal if the tabs are a little tall.  I glued the box up using a medium CA glue and then sanded all the tabs flush.  The finish is a simple rust-o-leum semi gloss.  I sprayed a couple of light coats and then sanded with 320 sandpaper and gave it one last coat. The finish is super nice.

A Few Things I Learned About Laser Cutting And Engraving

I am no way an expert on laser cutting and engraving.  But if you google what you want to know in regards to laser choice, how to use the software and designing projects, there is no end to the info.  I will add a list of essentials if you are new to laser cutting and engraving below for you to review.  My laser is a Sculpfun S30 Pro Max, 20 WATT.  I am very happy with it thus far.  Would I go bigger?  Yes, I could always use more power.  For a project like this, I would think a 10 WATT or even a 5 WATT could work, It’s just a little slower.  I think to cut the top of this project was about 13 minutes, the box bottom probably 3 minutes or so.  I don’t think I would go below a 10 WATT.  My software is Lightburn.  The license is good for three machines.  Again there is so much help on line for this software, you will find the help you need.  One thing that tripped me up a couple of times is when switch back and forth between inches and MM.  It can do some strange things to your layout!  Watch it.  Also, when laying out your finger joints, you should really have a inexpensive micrometer to measure the material as it does affect how you size you tabs.  You have much less sanding!  There are ways to reduce your cutting and engraving time, again, spend some time on youtube.  I shaved a bunch of time off on the engraved rails just by flipping the top 90 degrees in the software.

Check Price On Amazon

Check Price On Amazonb

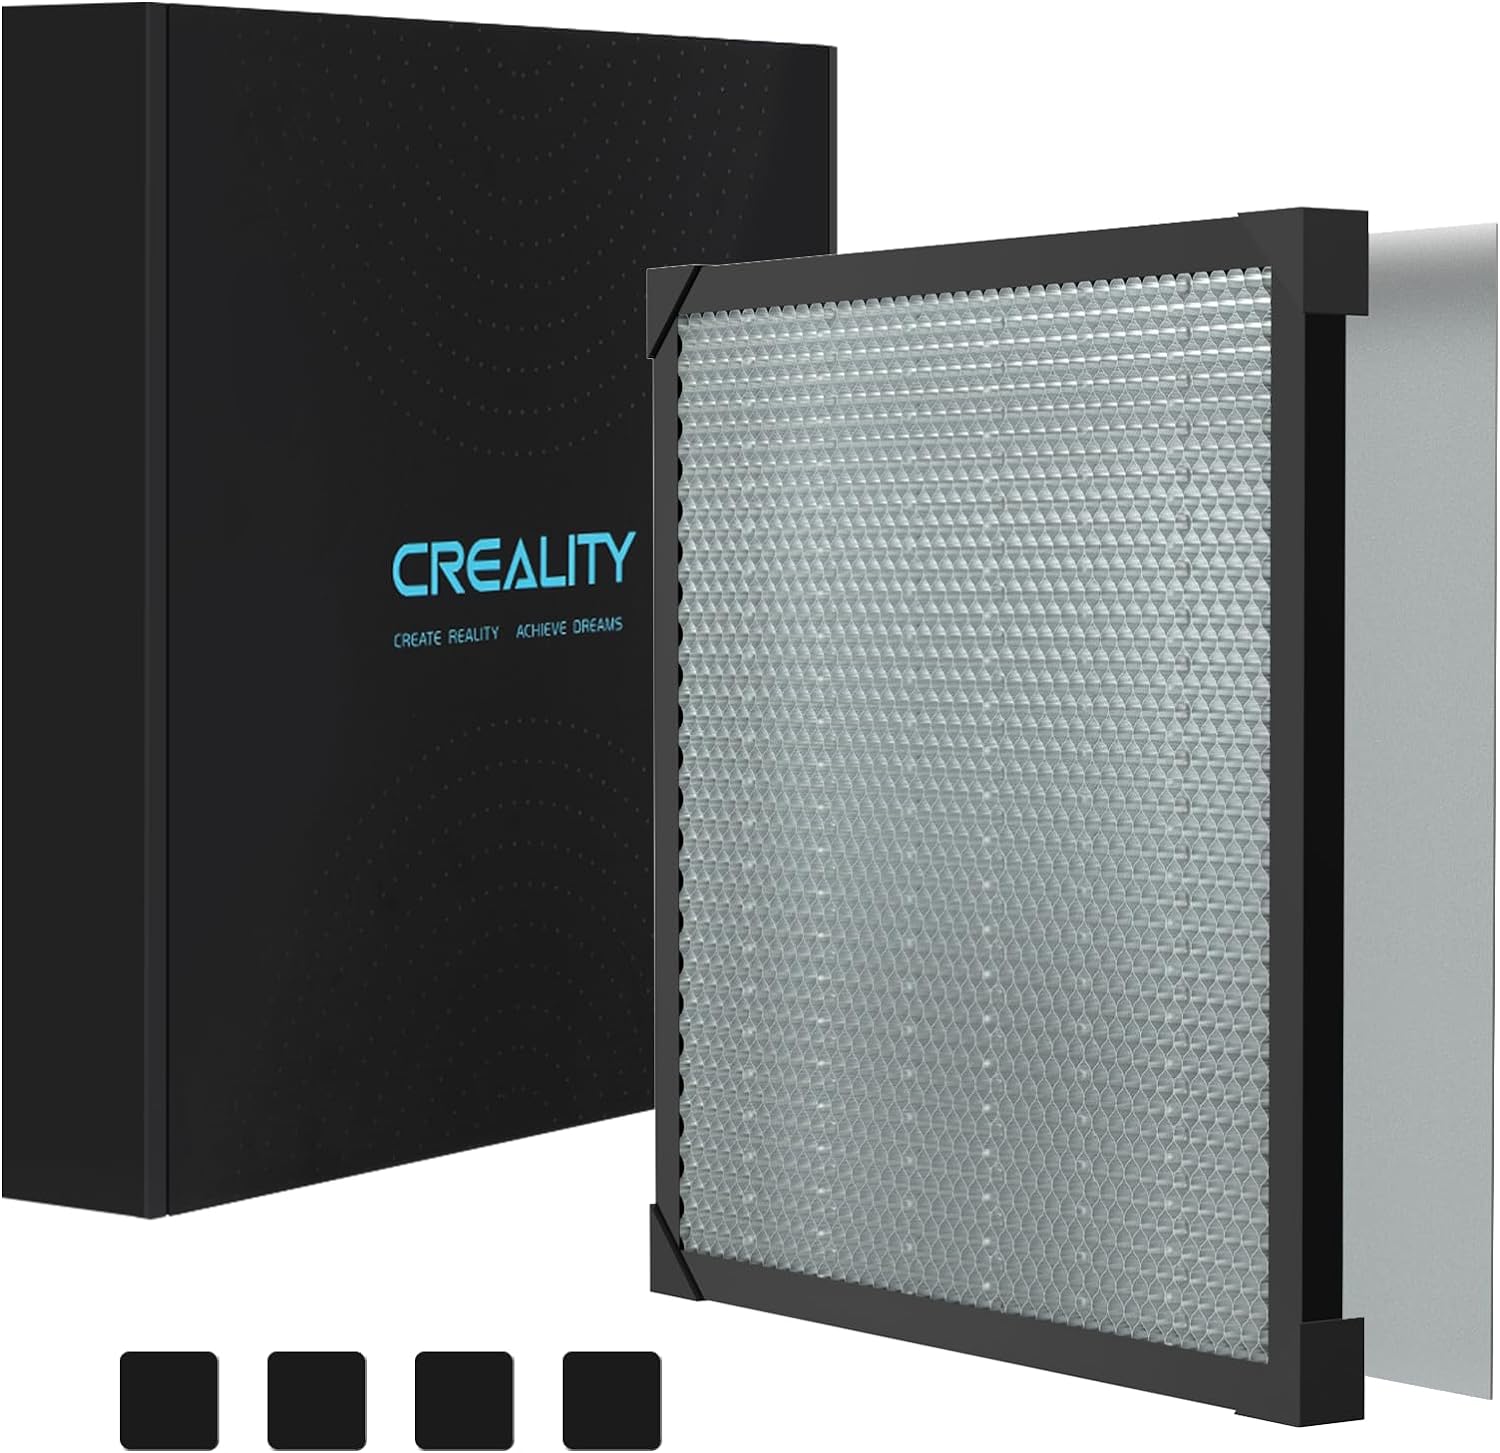
Honeycomb Laser Bed

Check Price On Amazon

Must Haves For Laser Engraving & Cutting

My Laser Set Up

  • Laser, 10 WATT or better
  • Lightburn software or other
  • Air assist for cutting
  • Laser goggles
  • Enclosure for laser with ventilation
  • Honeycomb laser cutting board
  • Inexpensive micrometer
  • Stable work surface
  • Plastic push pin clamps and magnets to hold material.

My laser is the Sculpfun S30 PRO MAX 20 WATT with air assist.  I added a Creality laser cover with an exhaust fan that I mounted to a base so it opens like a convertible.  I have a 400MM x 400MM honeycomb cutting board that I mounted to the work base as well.  This assists me with jig alignment.  I use Lighburn software on my laptop computer.  I have the software on my PC as well so often times I will create the file and then transfer with a thumb drive to my laptop.  I use the standard glasses that came with the laser, but the cover also has protective viewing windows.  I use plastic push clamps and heavy magnets to hold material in place.  I also have a inexpensive calipers that I measure wood thickness when making box tabs.


s-l1600-1.jpg

My son has loved building Legos since he was a kid.  I have loved the Concorde passenger plane since I was a kid.  So when Lego introduced the Concorde kit (#10318) in their ICON series, I had the perfect plan. I would buy the set, my son would love to build it and I would have an awesome display piece in my office.  I am here to tell you that the plan worked perfectly and we were both extremely satisfied with the Lego Concorde set.

Lego Concorde 10318

Available On Ebay Now!

Lego 10318 Concorde Specifications

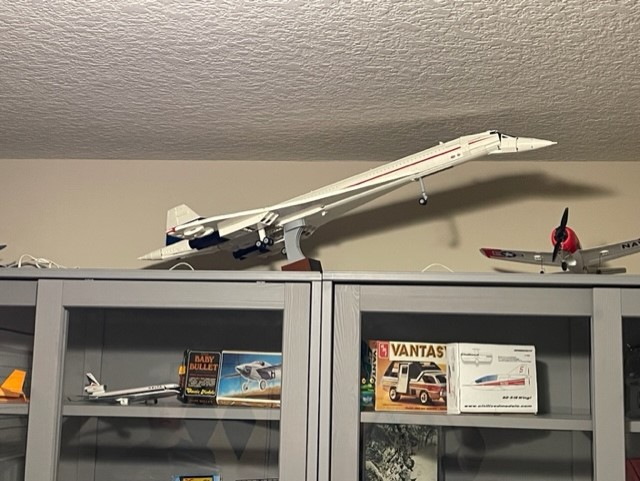
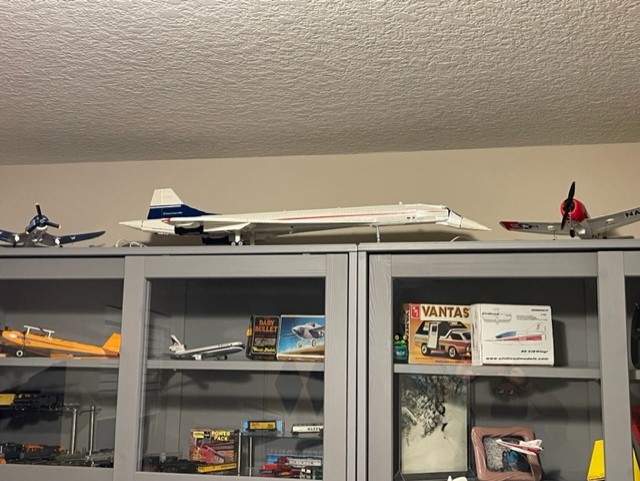
The Lego Concorde is a massive kit.  It has 2038 pieces total.  My plan was to fit it in my display case.  I should have measured first!  Length is 42″, wingspan is 17″ and height is 6″.  So, it ended up displaying on top of my display cabinet, which is fine.  It almost touches the ceiling but it fits and looks so cool.  The instruction booklet is more like a small catalog, about 1/2″ thick or so.  My son is mid 20’s and build time was under 7 hours.  He actually built it in just 2 or 3 sittings.  Once he get’s going on these things he is committed.  He raves about the build and the kit specific parts.  The display stand is well built and holds the model securely if you choose to use it.

Right Now on eBay 
Clicking a link to eBay may result in a referral commission being paid if a purchase is made.

Loading…

Right Now on eBay 
Clicking a link to eBay may result in a referral commission being paid if a purchase is made.

Loading…

A Couple Of Cool Features On The Lego Concorde

The Lego Icon Series Concorde has a few cool details you will want to know about.  First, it wouldn’t be the Concorde with out the droop nose.  The real Concorde would droop the nose so the pilots could have better vision while maneuvering the aircraft on the ground. You will note in my picture that I have the nose drooped while the plane is in flying position.  Let’s just call that artistic license, the nose can be moved to up or down positions.  The landing gear retracts by turning the tail cone.  Again another great bit of engineering that makes the Concorde set so neat.  You can remove a section of the fuselage to reveal a few seats as well as the lavatory.  It’s little things like these that what make Lego Lego.  An after market feature you may consider is a lighting kit available on ebay.  I haven’t added one yet but I just might!

Simply Put The Lego 10318 Concorde Is A Great Kit

Simply put, the Lego Icon Series Concorde, kit #10318 is just as advertised, an Icon.  Not only is the build a rewarding experience but you will end up with a real statement piece to do display.


Simple-Shelves-From-Wine-Shelves.jpg

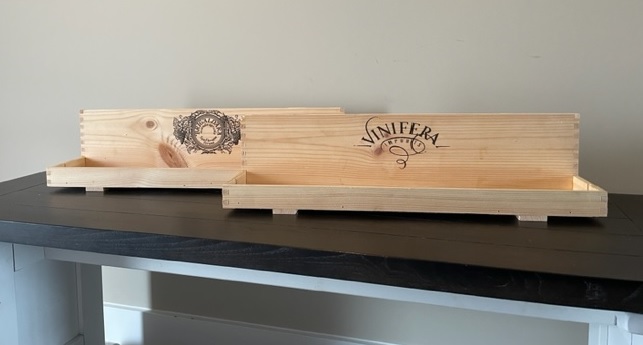
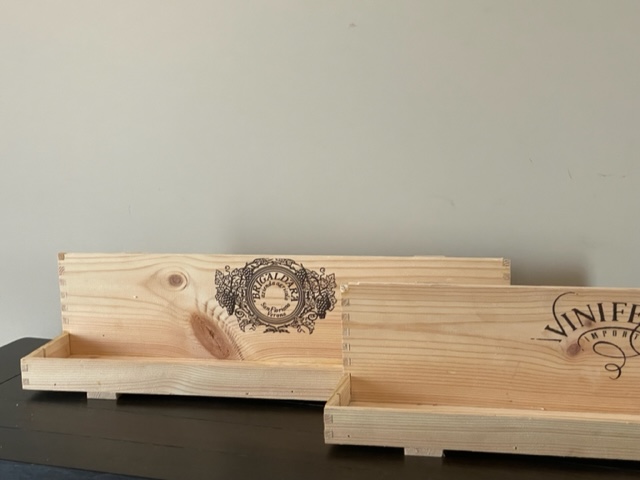
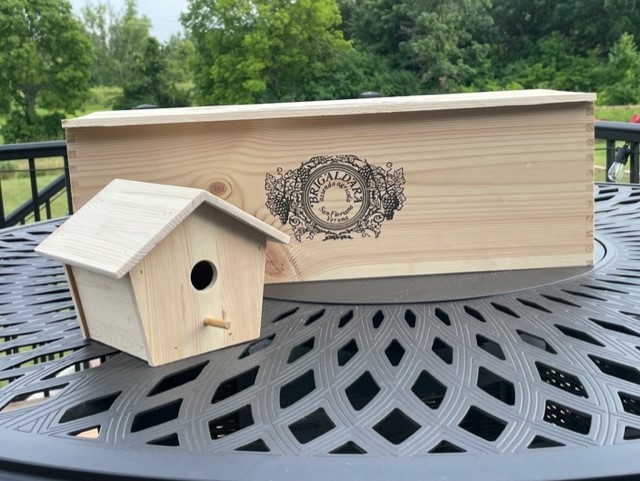
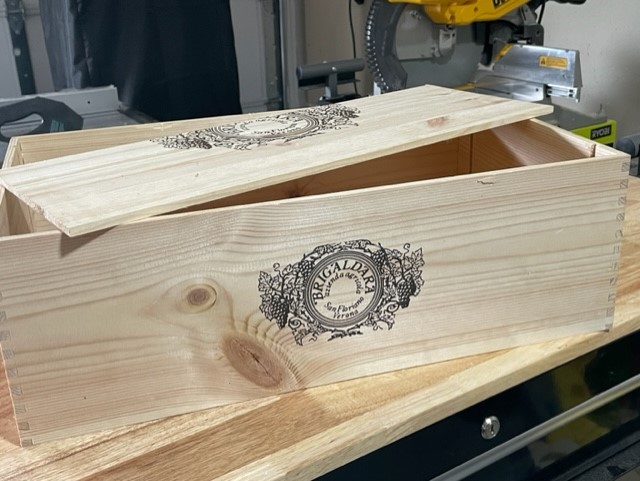
A while ago wrote a short post on making a birdhouse from old wine crates.  I wanted to show how you can recycle the wood on a simple wine crate into a project.  Wine crates are easy to come by and if you can’t get them for free, you can get them for just a few dollars.  My birdhouse used the bottom and half of the top of the wine crate.  With the rest of the crate, I had enough wood to make to simple shelves and utilize the branding on both sides of the crate.

Shelves From Old Wine Crates

Choosing A Wine Crate For This Shelf

The wine crate I used had finger joints that I thought would add to the charm of the shelves.  It also had branded logos on both sides that I was hoping to use.  If I couldn’t make the logos work, I could just flip the boards over and go with a blank look.  As it turned out, I was able use both logos.  I can’t say the design of the shelf is really mine.  My wife had picked up a similar shelf at Hobby Lobby and thought it was a neat little design and the dimensions lined up close to the wine crate I had.

Click On Images To Shop Top Selling Wine Accessories On Amazon

Construction Of The Shelves

Construction of the shelves is really pretty basic.  If you have done any type of woodwork, look at the pictures and go from there.  Mine are 22” long, about 4-1/2” deep and 5” tall.  The little pieces on the bottom and the back (I call them straps for lack of a better term) that make it look more like a crate are 1-1/2” wide.  The front of the shelf is 1-1/2” tall and so there is an edge around the whole shelf surface.   This is another one of those projects that you build without plans eyeballing dimensions and details.  For instance with the straps, I played with the idea of 2 or maybe 3, decided on 2 and then moved them around to find out how far to keep in from the edge of the shelf.

I started by setting the fence on my table saw to 1-1/2” wide and checked again that my logos would be intact.  Again not a big deal if you do not want them to display.  I cut the short ends of the crate first and moved on to the long sides.  Take care as you cut as the finger joints aren’t that strong and the crate gets wobbly fast.  You may want to consider tacking a corner brace in place to make it more rigid.  I was just careful and deliberate with the cut and it worked out well.  Using my miter saw and stop blocks, I cut the shelf edge to about 4”.

That was the hardest part of the project.  Next I set my fence to just cut inside the front edge of the sides with the logo.   You may lose one of the finger joint fingers in the cut.  I actually grabbed my off the floor and glued them back in later.  I then cut the bottom of the shelf to fit perfectly inside the shelf edge. Now I was ready to assemble.

Using glue and my brad nailer I pinned the shelf bottom to the shelf edge and then added the back of the shelf.  Work slowly and make sure your nailer is positioned correctly to avoid shooting through the thin material.  I then added the straps to the bottom and finally the back.

From One Wine Crate

So, from one wine crate that cost me about $3 I have a decorative birdhouse and two shelves.   These are not craftsman quality project by any means.  After all, they are built out of an old wine crate.  These are simple projects that are simple and easy to build and that you can not only hang in your own home but give as gifts or even sell on Etsy or at craft fairs.  The tools needed are minimal.  A table saw, miter saw and a small brad nailer will make quick work of these shelves.  I suppose you could use a jig saw or hand saw as well if need be.


thumbnail_IMG_0942.jpg

This post isn’t as much about building a birdhouse as it is about utilizing an old wine crate for the lumber.  A few months ago I was at total wine and they had a few wood wine crates in the stack of boxes.  Boxes are free but the crate was $3 I think.  I have used wine crates in the past for wall hangings and shelves so I thought I would grab one and make something out of it.  So today I was bored and wanted to try out my new table router so I went about building a small decorative birdhouse.  I didn’t have any plans but had thoughts of how big it should be and what shape and so I had at it.  I ended up making this cute little bird house using the lid and half of the bottom of the crate.
What I like about the wood in wine cases is that it’s usually super dry, relatively clear and any knots are usually pretty solid.  The wood is around 5/16” or so not as clunky as ¾” pine.  It’s easy to cut and sand and the price is right.  I started by pulling the nails of the lid to make sure I didn’t bump them with my saw.  The bottom was stapled so I knocked the bottom out and then cut off the areas with the staples.
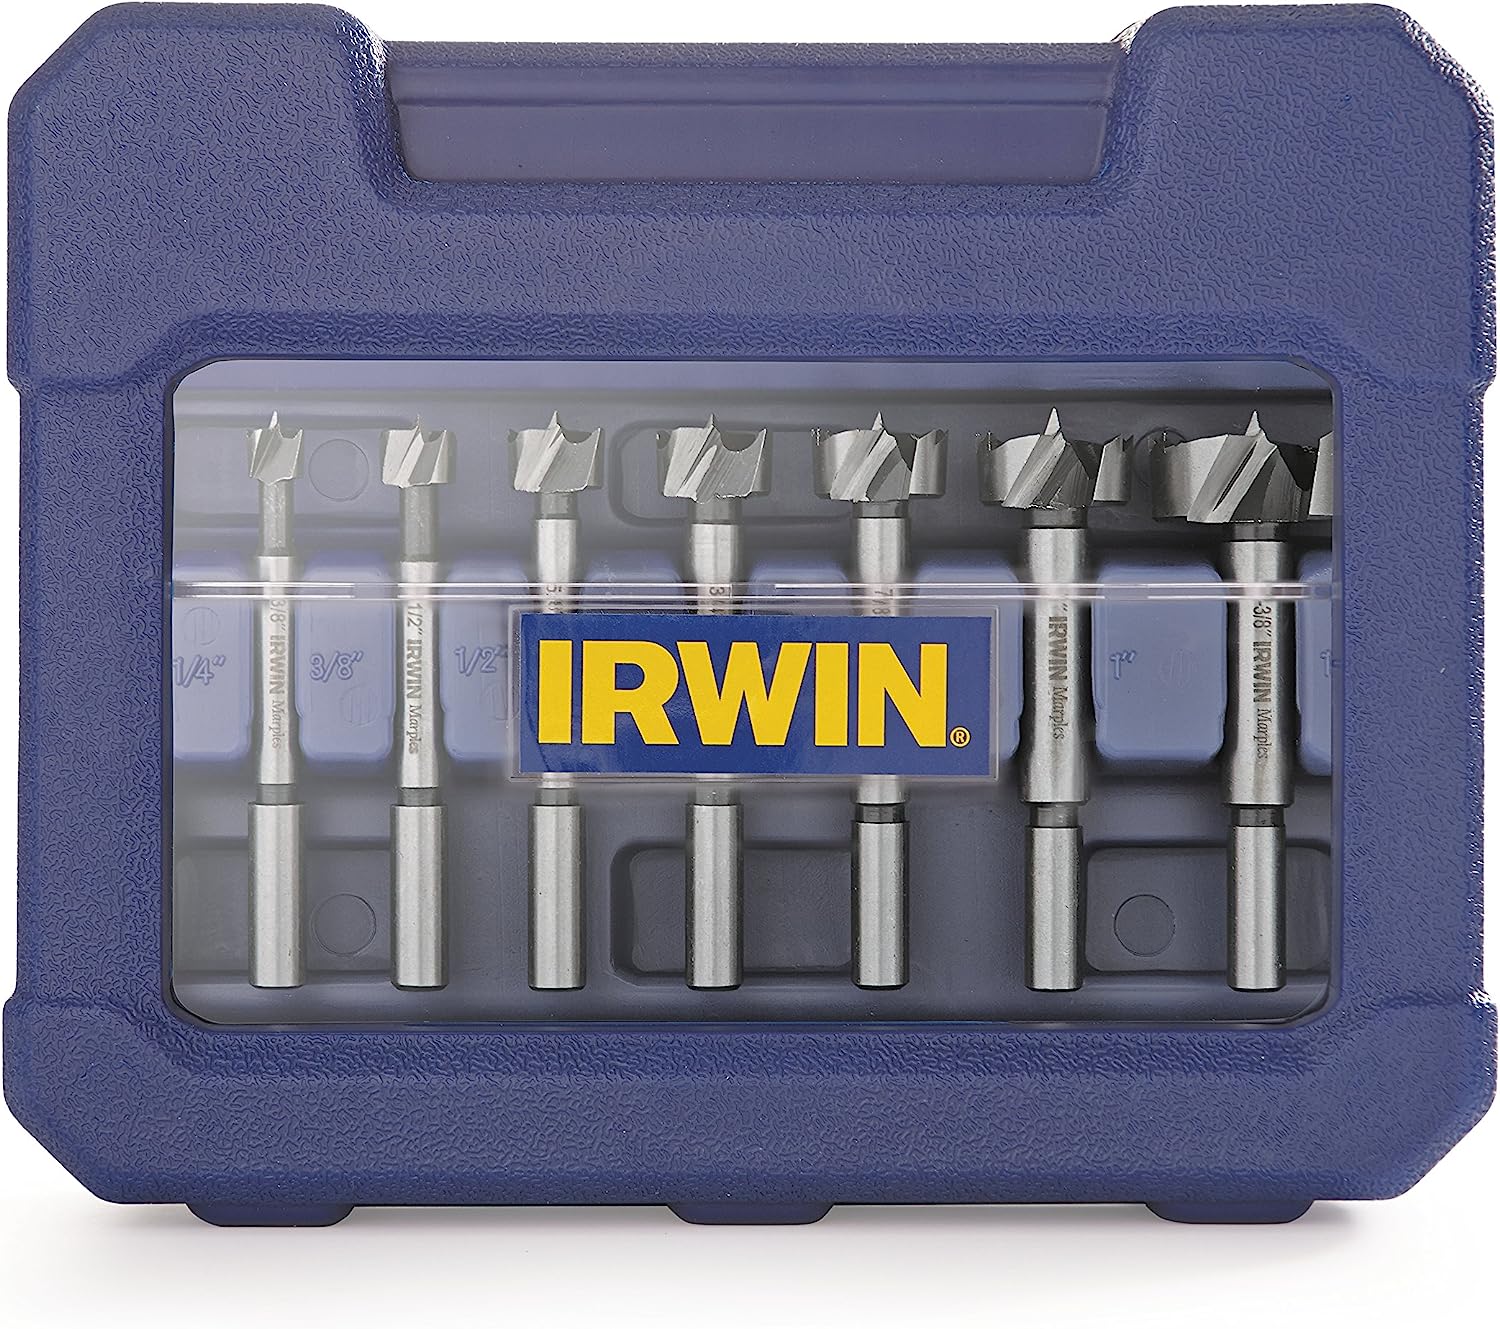
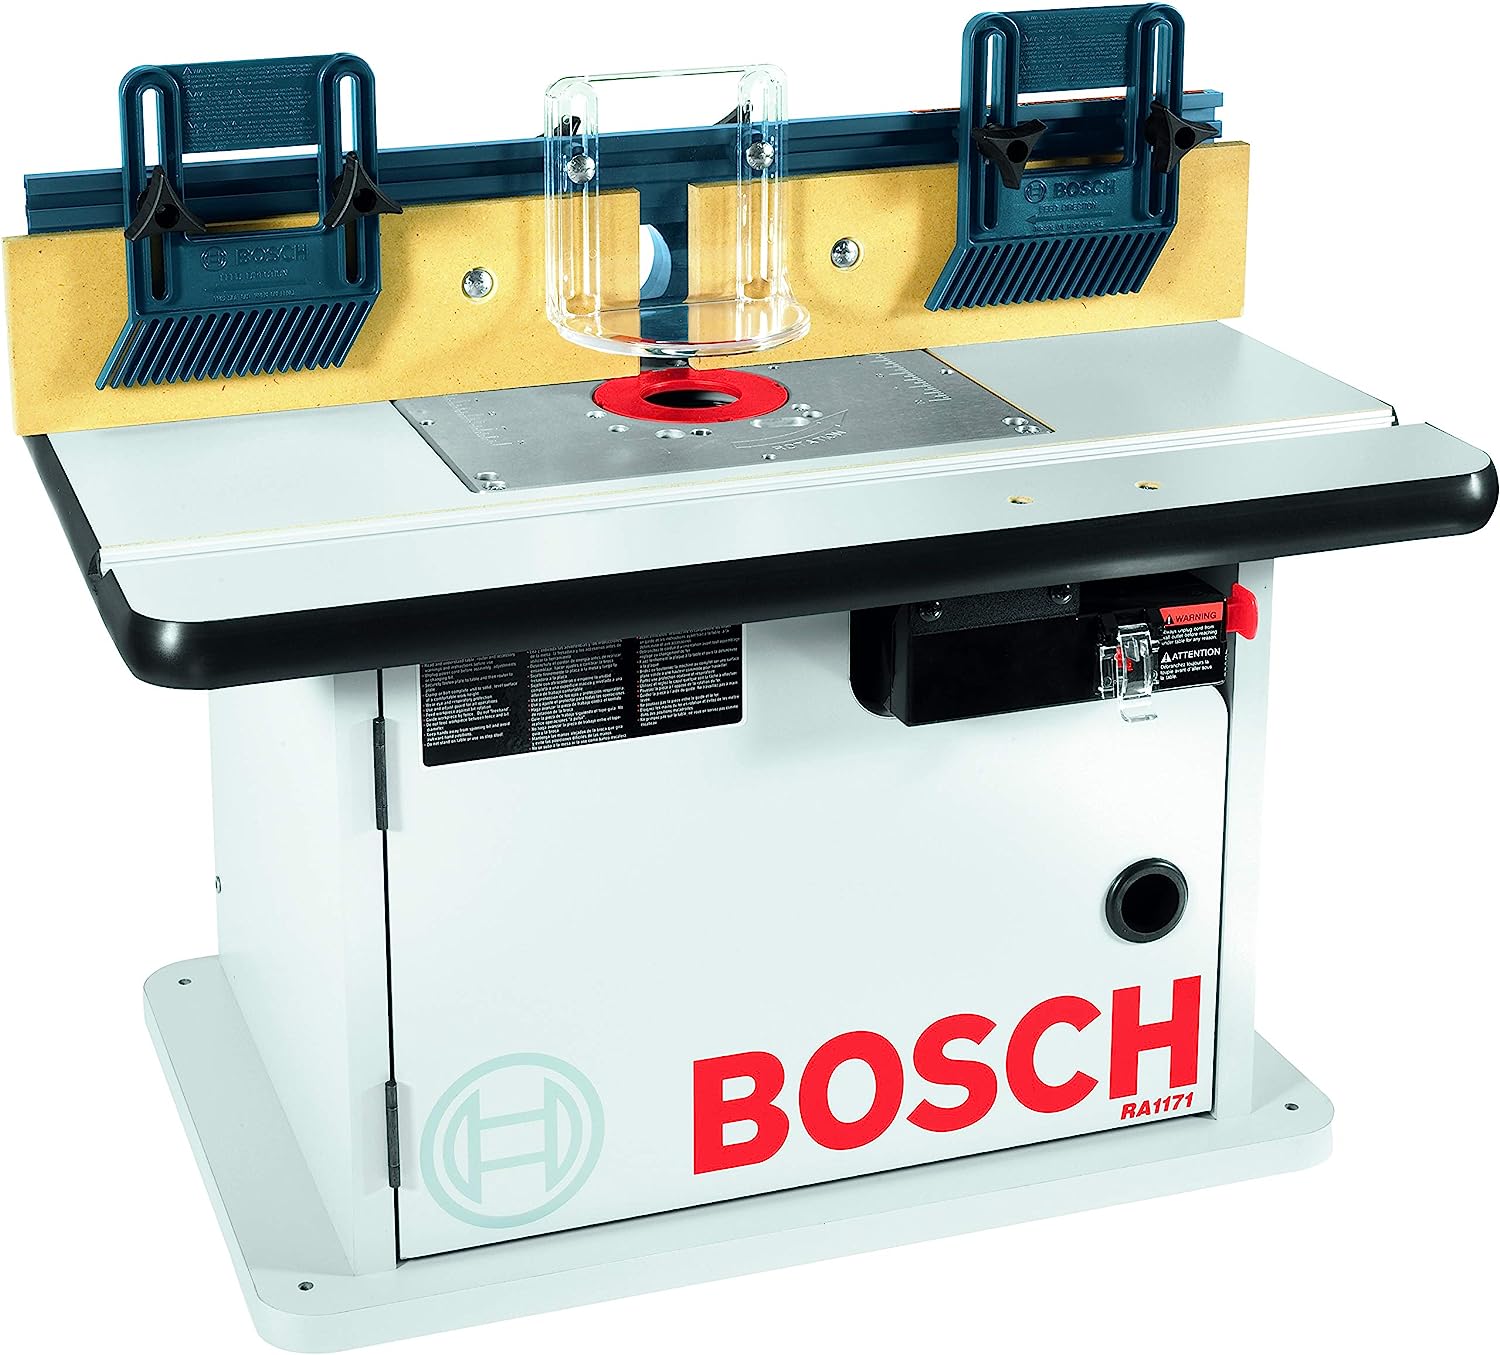
Forstner BitsI wanted more than just a square box so I tapered the front and back about 10 degrees and guessed on the roof angle.  Size came in around 4” wide by 5” deep and 5-1/2” tall.  Again I didn’t have plans just built what I thought looked right.  I used a ¼” straight bit on my Bosch router table using the fence to make a groove to accept the sides.  I did have to make two passes, shifting the fence as the wood is wider than the bit I had, but no big deal.  Using the front as a guide for my table saw blade angle, I cut the bottom from a scrap of ships lap I had laying around.  To cut the hole in the front as well as the hole for the perch, I used a forstner bit.  If you don’t have a set of these, get one they are awesome for cutting clean holes.

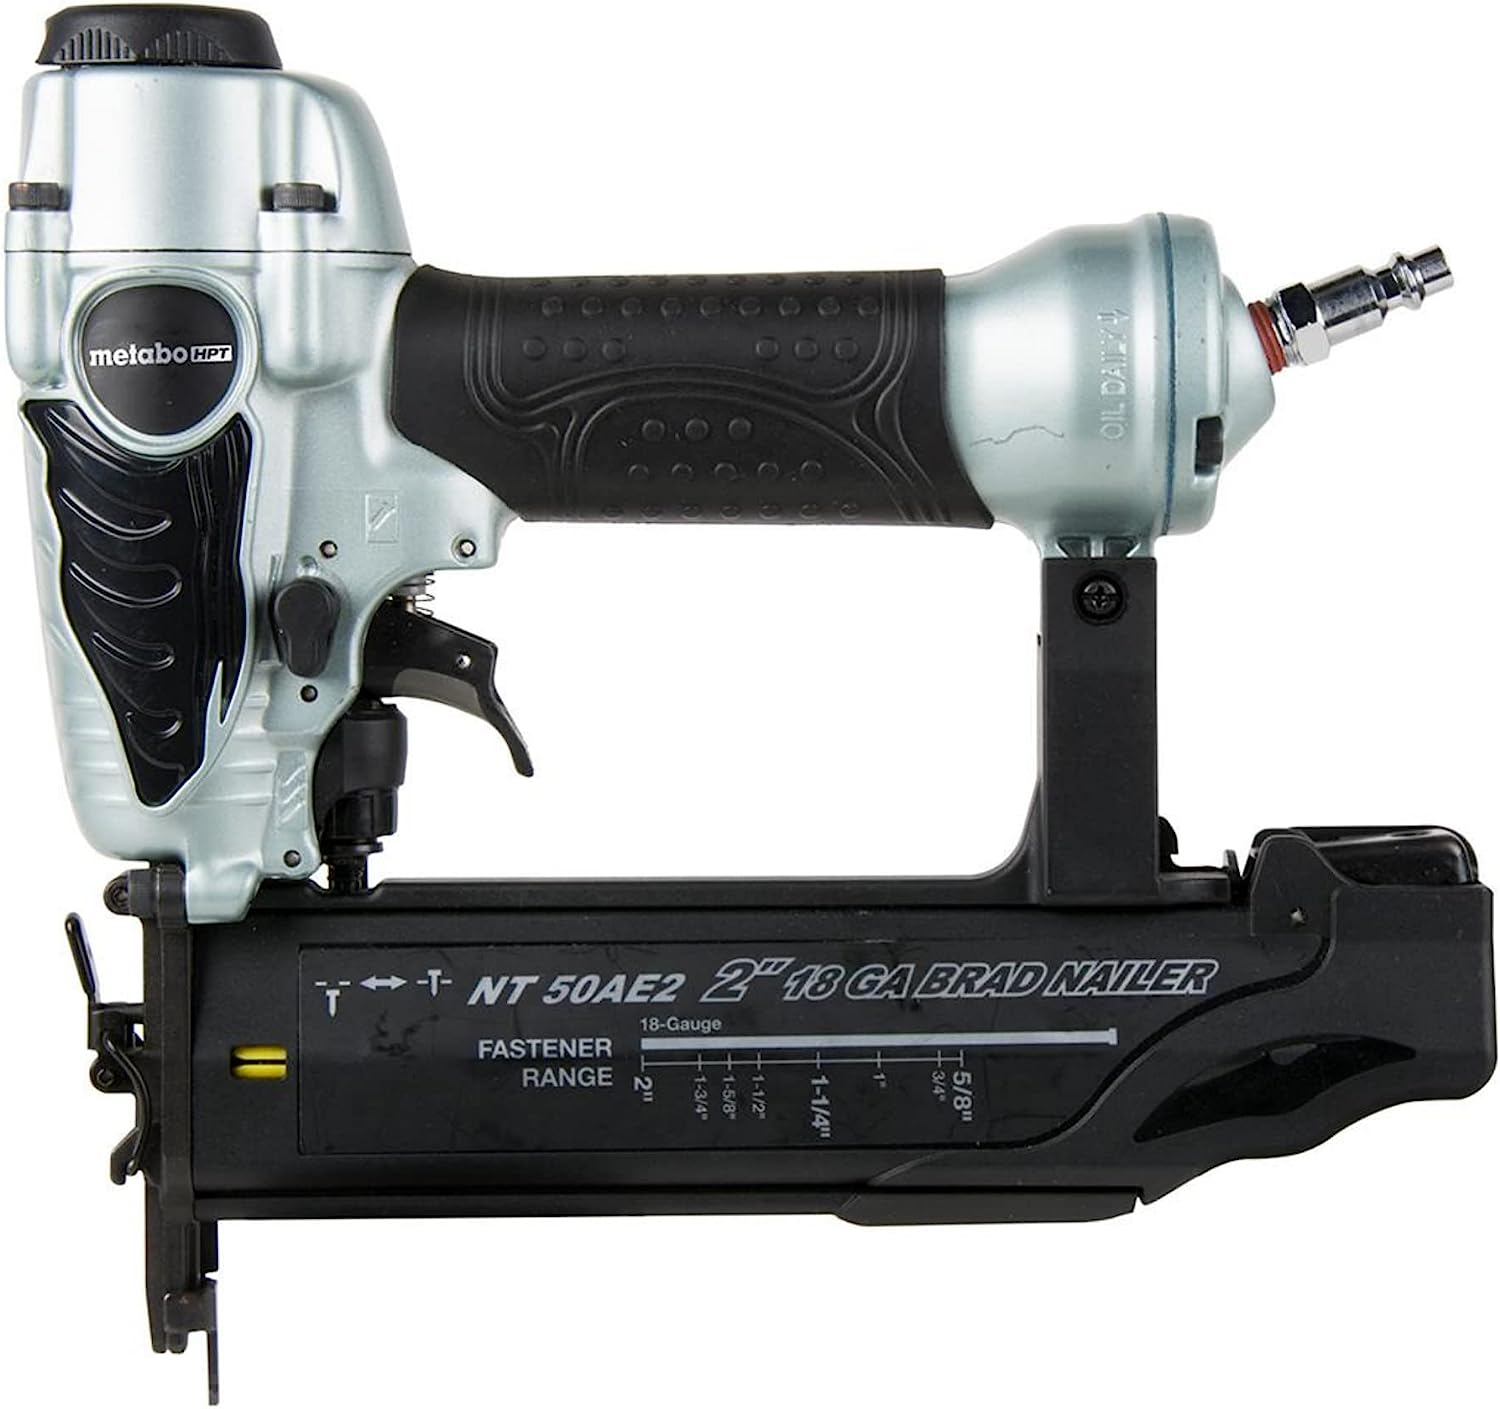
I used would glue and pinned the bird house together with my trusty Porter Cable brad nailer and 5/8” nails.  You can find a lot of different brad nailers online at Amazon.  The Porter Cable I have was super inexpensive and I have been really happy with the tool.  I gave the birdhouse a quick sanding and it’s ready for paint.  Being  it will be an indoor birdhouse, I will paint it with simple acrylic or latex and I may add a little sign and a front porch light from my model railroad supplies.

All and all, this was a fun little project.  I enjoy building simple one off projects without plans as I can change on the fly to whatever fits my whim.  If I wanted to make more than one, I would create some simple templates and record measurements.  But again the purpose of this project was to fight off boredom, try my new router table and show how useful wine crates can be in creating projects.  I know I accomplished the first two objectives, hopefully the last as well.

Brad nailer

Metabo HPT Brad Nailer Kit On Amazon

Irwin Forstner Bits

Irwin Forstner Bit Set On Amazon

Bosch Router Table

Bosch Router Tables On Amazon


TOOLANDPROJECT.COM

Tools, projects, fun.

WWW.TOOLANDPROJECT.COM

contact@toolandproject.com

blogging

From MN