Hand Tools

ChatGPT-Image-Oct-2-2026-11_42_37-AM-1280x853.png

Which Ramset Tool Is Best for Basement Framing? 4 Tools Compared

If you’re framing a basement and considering a Ramset powder-actuated tool, the right choice depends on how much fastening you need to do and whether this is a one-time DIY project or something you’ll use regularly. In this guide, I’ll compare four Ramset tools commonly considered for basement framing: the MasterShot, HammerShot, TriggerShot and Cobra. I’ll explain the differences in price, speed, fastener capacity, power adjustment and ease of use so you can choose the right tool for your project..

Why trust this comparison? This guide is based on 30 years plus experience in sales and service of Ramset tools and concrete fastening applications, with a focus on the differences that matter when choosing a tool for basement framing.

What Is a Ramset Powder-Actuated Tool?

A Ramset is a powder-actuated tool designed to drive specially designed fasteners into materials such as concrete and steel. Instead of using a drill bit and a mechanical anchor, the tool uses a controlled powder load to drive the fastener into the base material.

For basement remodeling, one of the most common applications is fastening wood framing members, such as 2×4 bottom plates, to a concrete basement floor. This can save a considerable amount of time when compared with drilling a hole, cleaning the hole, installing an anchor, and repeating the process for every fastening point.

Powder-actuated tools are powerful tools, however, and they need to be used with the correct fastener and load for the application. Always follow the manufacturer’s instructions and safety requirements.

The Four Ramset Tools

For a typical basement-framing project, you may encounter four popular Ramset options:

    • Ramset HammerShot
    • Ramset TriggerShot
    • Ramset MasterShot
    • Ramset Cobra Plus
Ramset Tool Best For Operation Ease Project
Hammershot Small project, low use, lowest cost Single ★★★★★ Small–Med.
Triggershot Easy single-shot use, smaller projects Single ★★★★☆ Small–Med.
Mastershot Ease of use, single shot, good fit for DIY Single ★★★★★ Small–Med.
Cobra+ Larger framing projects Semi-auto ★★★★☆ Med.–Large

Quick takeaway: For occasional basement framing, a single-shot Ramset can be a practical choice. For larger projects requiring many fastenings, the Cobra+ provides a faster workflow.

The right choice depends primarily on how often you plan to use the tool, how many fasteners you need to install, and whether convenience and speed are important to you. All four tools are designed around the same basic concept: use a powder-actuated load to drive a fastener into an appropriate base material. The major differences are how the tool is operated, how the loads are fed into the tool, and how quickly you can install fasteners.  All four tools will fasten 2x to concrete and steel.

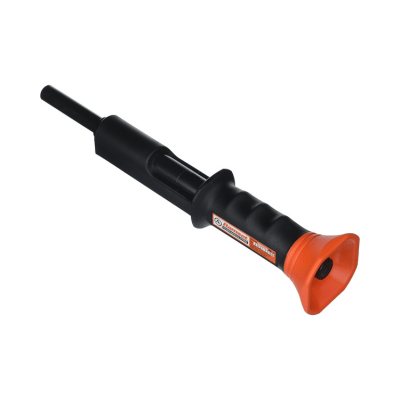
1. Ramset HammerShot
Ramset Hammershot
Ramset Hammershot


The Ramset HammerShot is one of the simplest powder-actuated tools available. It uses individual .22-caliber loads and pins.

To operate the tool, you load the fastener and powder load, place the tool against the work surface, and strike the end of the tool with a hammer. The hammer blow activates the load and drives the fastener into the concrete or steel.

Why Choose the HammerShot?

The biggest advantage of the HammerShot is its simplicity and relatively low cost. If you’re a homeowner who only needs to install a few fasteners for a small basement project, this can be a practical option.  For example, if you’re installing a small number of bottom plates or making a few attachments to concrete, you may not need a more sophisticated powder-actuated tool.

HammerShot Pros

      • Simple design
      • Relatively inexpensive
      • Uses .22-caliber loads
      • Good for occasional use
      • Suitable for small fastening jobs

HammerShot Cons

      • Requires a hammer to fire
      • Slower than trigger-operated tools
      • Less convenient for larger projects

If you’re only going to use a Ramset a handful of times, the HammerShot may be all the tool you need.

2. Ramset TriggerShot
Ramset Triggersho
Ramset Triggershot

The Ramset TriggerShot operates differently from the HammerShot. Instead of striking the tool with a hammer, you press the tool against the work surface and pull the trigger. That makes it more convenient when you’re installing a larger number of fasteners or working in locations where swinging a hammer is difficult.  For instance, if you are working overhead fastening a 2x to steel, it simply is an easier install.

When Is the TriggerShot Useful?

One example is overhead work. If you’re working in a tight location or trying to fasten something where you don’t have much room to swing a hammer, a trigger-operated tool can be considerably more convenient.

The TriggerShot still uses .22-caliber loads, so it retains the relatively simple loading system of the other .22-caliber Ramset tools.

TriggerShot Pros

      • Trigger operation
      • Easier to use in tight spaces
      • Convenient for overhead applications
      • Uses .22-caliber loads
      • More convenient than a hammer-fired tool

For a homeowner who wants something a little more convenient than the HammerShot, the TriggerShot is worth considering.

3. Ramset MasterShot
Ramset Mastershot 40088
Ramset Mastershot
40088


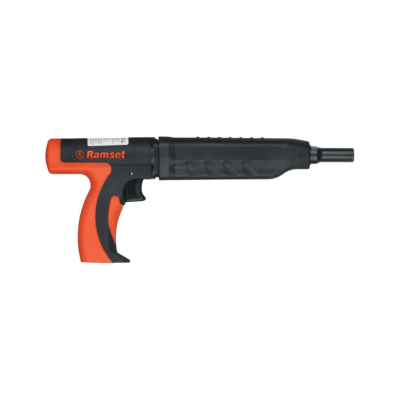
For many homeowners, the Ramset MasterShot 4088 is an excellent all-around option for basement framing. The MasterShot uses .22-caliber loads and has a relatively simple design. It is also known for being reasonably quiet compared with some other powder-actuated tools. I’ve had contractors use these tools, and one of the things they like is the straightforward design and durability.

When Should You Consider the MasterShot?

The MasterShot makes more sense when you’re doing more than just a handful of fasteners.

For example, if you’re:

      • Framing an entire basement
      • Installing numerous bottom plates
      • Installing furring strips
      • Fastening wood to concrete
      • Completing a larger remodeling project

You’ll probably appreciate having a tool that’s more convenient and comfortable to use.  For the typical homeowner doing a basement-framing project, this is the type of tool I’d seriously consider.

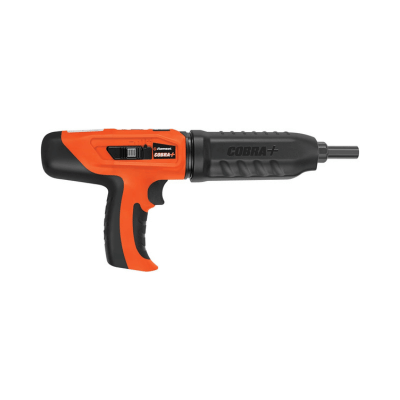
4. Ramset Cobra Plus
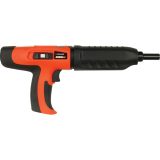
Ramset Cobra Plus


The Ramset Cobra Plus is a step up from the single-shot .22-caliber tools. Instead of loading individual powder loads, the Cobra Plus uses a .27-caliber 10-shot strip. The strip system allows you to move through fasteners more quickly, making the tool better suited to applications where you’re installing a larger number of fasteners.  This particular Ramset tool can also be used on an extension pole if you do any overhead work.

Why Use a Strip-Loaded Powder-Actuated Tool?

If you’re installing hundreds of fasteners, repeatedly loading individual powder loads can become tedious. The 10-shot strip makes the process faster because multiple loads are connected together. The Cobra Plus also includes features such as power adjustment and a quieter operating design.

Cobra Plus Pros

      • 10-shot strip system
      • Faster operation
      • .27-caliber loads
      • Power adjustment
      • Good choice for higher-volume fastening
      • Useful for small contractors and frequent users

The Cobra Plus may make sense if you’re a small contractor, frequently perform fastening work, or simply want a more capable powder-actuated tool.

Which Ramset Is Best for Basement Framing?

There isn’t one Ramset that is perfect for every user. The best choice depends on the size of your project and how often you expect to use the tool.

For a Few Fasteners: HammerShot

If you’re a homeowner who only needs to install a small number of fasteners, the HammerShot can be a simple and economical solution.

It is particularly suitable when you’re working on a small project and don’t expect to use the tool regularly.

For More Convenient Operation: TriggerShot

If you don’t want to strike the tool with a hammer, the TriggerShot gives you trigger operation and can be particularly useful in tight or overhead locations.

The trigger-operated design can also be more convenient when you’re installing a number of fasteners during a remodeling project.

For Most Homeowner Projects: MasterShot

If you’re framing a basement and expect to install a significant number of fasteners, the MasterShot is a very practical choice.

Its simple design, relatively quiet operation, and ease of use make it well suited to many homeowner applications.

For Higher-Volume Work: Cobra Plus

If you’re a small contractor or expect to do a lot of fastening, the Cobra Plus and its 10-shot strip system can make sense.

The faster loading system becomes more valuable as the number of fasteners increases.

What Is the Best Ramset for a Homeowner?

For many homeowners, the decision comes down to how much fastening they actually have to do. If you’re completing a small project with only a few fasteners, spending more money on a higher-capacity tool may not be necessary.

On the other hand, if you’re framing an entire basement, installing furring strips, or completing a larger remodeling project, the convenience of a trigger-operated or strip-loaded tool can become much more important. For a typical homeowner framing a basement, the MasterShot is a tool I would seriously consider because it offers a good balance between simplicity and capability.

How Many Fasteners Do You Need for Basement Framing?

The number of fasteners required depends on the framing layout, the material being fastened, and applicable building requirements. For a basement bottom plate, fasteners are generally installed at regular intervals along the plate rather than simply placing one at each end. Your local building requirements and the manufacturer’s fastening recommendations should determine the appropriate spacing and fastener selection for your specific project.

This is another reason the number of fasteners matters when choosing a Ramset. A homeowner installing a few fasteners has different needs than someone fastening hundreds of points throughout an entire basement.

What Else Can I Use a Ramset For?

Fastening wood framing to concrete is one of the common applications for powder-actuated tools.  Many trades use Ramset tools for a variety of applications.  Anytime you need to attach something to concrete, masonry or steel a Ramset may be useful.  For instance, electricians may use them to fasten boxes to steel columns, support light fixtures or attach EMT to the wall.  Other uses include attaching foam to concrete, plywood to steel, installing acoustical ceilings and supporting cable runs.  For the

Can You Use a Ramset on Steel?

Some Ramset powder-actuated tools and fasteners can be used for fastening applications involving steel, but the specific tool and fastener combination matters. Steel thickness, hardness, and the type of attachment all affect whether powder-actuated fastening is appropriate.

Always check the manufacturer’s specifications before fastening into steel. Do not assume that a fastener that works in concrete is automatically suitable for steel.

Do All Ramset Tools Use the Same Fasteners?

Not necessarily. While these tools can perform the same basic job, they don’t all use the same type of powder load. The HammerShot, TriggerShot, and MasterShot use .22-caliber loads, while the Cobra Plus uses .27-caliber strip loads.

You also need to make sure you’re using the correct fastener for the material you’re fastening to and the specific Ramset tool you’re using. Always follow the manufacturer’s instructions for the tool, fastener, and powder load combination.

What Power Level Ramset Load Should You Use?

Choosing the correct power level is an important part of using a powder-actuated tool. You don’t simply want the most powerful load available. The proper load depends on the material you’re fastening into, the fastener you’re using, and the application. Using too much power can create problems, while insufficient power may not properly set the fastener.

The goal is to use the appropriate power level so the fastener is properly driven without damaging the base material or the fastener. If you’re unsure which load to use, consult the tool manufacturer’s instructions and load-selection information before beginning your project.

Ramset Fastener Selection

Choosing the correct fastener is just as important as choosing the tool. Ramset offers different fasteners for different applications and base materials. Fastener length, shank diameter, head style, and the type of material being fastened all need to be considered.

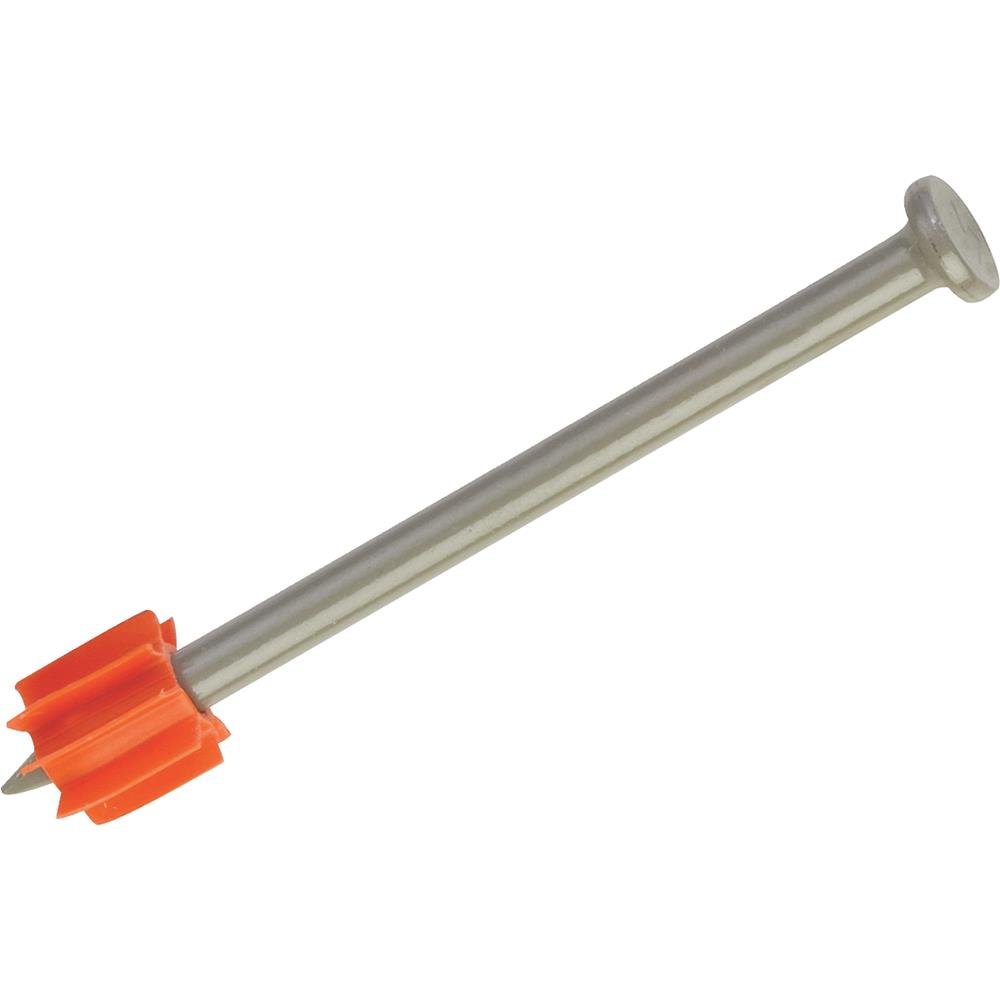
For example, the fastener you use to attach a 2x wood bottom plate to a concrete floor would typically be 2-1/4″ and for a 2x to steel, a 2″ (1-7/8″ Ramset pin SP178 is ideal) would be used.  Don’t select a fastener simply because it fits the tool. Make sure it is approved for the specific application and base material.

Ramset Safety

Powder-actuated tools are powerful tools and should be treated accordingly.

      • Read the manufacturer’s operating instructions before using the tool.
      • Get online cerification.
      • Wear appropriate eye and hearing protection.
      • Make sure you are using the correct fastener and load.
      • Never point the tool at another person.
      • Keep your hands and body away from the muzzle.
      • Make sure the material you’re fastening into is suitable for powder-actuated fastening.
      • Inspect the work area for potential electrical, plumbing, or other hazards.
      • Follow all applicable safety requirements and manufacturer’s recommendations.

If you’re unfamiliar with powder-actuated tools, take the time to understand how the tool operates before beginning your project.

Ramset vs. Drilling and Anchoring

One of the biggest reasons homeowners and contractors use powder-actuated tools is speed. With a traditional concrete anchoring method, you may need to drill a hole, remove the concrete dust, install an anchor, and tighten or drive the fastener. That process has its place and can be the right choice for many applications.

A powder-actuated tool can eliminate several of those steps when the application is appropriate. For repetitive basement framing, that difference can add up quickly. If you’re fastening a long run of bottom plate, the time savings can become significant.

However, powder-actuated fastening isn’t appropriate for every situation. The base material, fastening requirements, load, fastener, and location all need to be considered.

Frequently Asked Questions About Ramset Tools

What is a Ramset used for?

A Ramset is a powder-actuated fastening tool commonly used to drive specially designed fasteners into concrete, masonry, and certain steel applications. It is often used for construction, remodeling, electrical, mechanical, and framing applications.

Can I use a Ramset for basement framing?

Yes, powder-actuated tools are commonly used for fastening appropriate wood framing components to suitable concrete substrates. Make sure you use the correct tool, fastener, and powder load for the application.

Which Ramset is easiest for a homeowner to use?

That depends on the project. A simple HammerShot can work well for occasional fastening, while a trigger-operated tool such as the TriggerShot may be more convenient for some applications. For larger homeowner projects, the MasterShot provides another option.

Are Ramset tools loud?

Powder-actuated tools produce a loud report when fired, so appropriate hearing protection should be used. Some Ramset models are designed to operate more quietly than others.

Do I need different Ramset loads for different materials?

The appropriate load depends on the specific tool, fastener, base material, and application. Always follow the manufacturer’s load-selection instructions rather than simply choosing the strongest load.

Can a Ramset replace a concrete drill?

Not in every application. A powder-actuated tool can be much faster for certain repetitive fastening jobs, but drilling and mechanical anchoring remain appropriate for many other applications. The correct method depends on the material, load requirements, fastener, and project specifications.

Final Thoughts

All four of these Ramset tools can be used for the basic application we’re discussing: fastening 2×4 framing to concrete or steel when the application and materials are appropriate. The difference is primarily in how the tools operate and how much fastening work they’re designed to handle.

For an occasional homeowner project, a HammerShot may be enough. The TriggerShot provides more convenient trigger operation, while the MasterShot is a good general-purpose option for a larger basement-framing project. For higher-volume work, the Cobra Plus offers a 10-shot strip system that can speed up the fastening process.

If I were choosing a Ramset for a typical homeowner who is framing a basement, I’d lean toward the Ramset MasterShot because it provides a good combination of simplicity, convenience, and capability for this type of project. And remember: selecting the right power level and fastener is just as important as selecting the tool.

If you’re not sure which Ramset load or fastener you need for your particular application, check the manufacturer’s recommendations before you begin.
Untitled-design-33.png

Tapcon vs Ramset: Which Is Better for Basement Framing?

Tapcon vs Ramset: Compare speed, strength, cost, and best uses to choose the right fastener for your basement framing project.  I have spent over 30 years selling power tools and fasteners that are used in fastening to concrete.  I have had many conversations and projects where the question is asked, “which is better, Tapcon or Ramset?”.  Here is a little info culled out of the many conversations I have had with contractors over the years that will help you decide which of these options is better for your basement buildout or other applications.

Tapcon

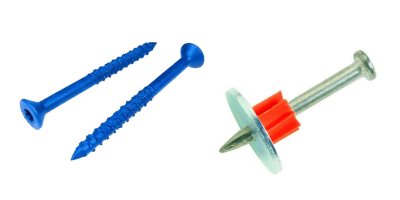
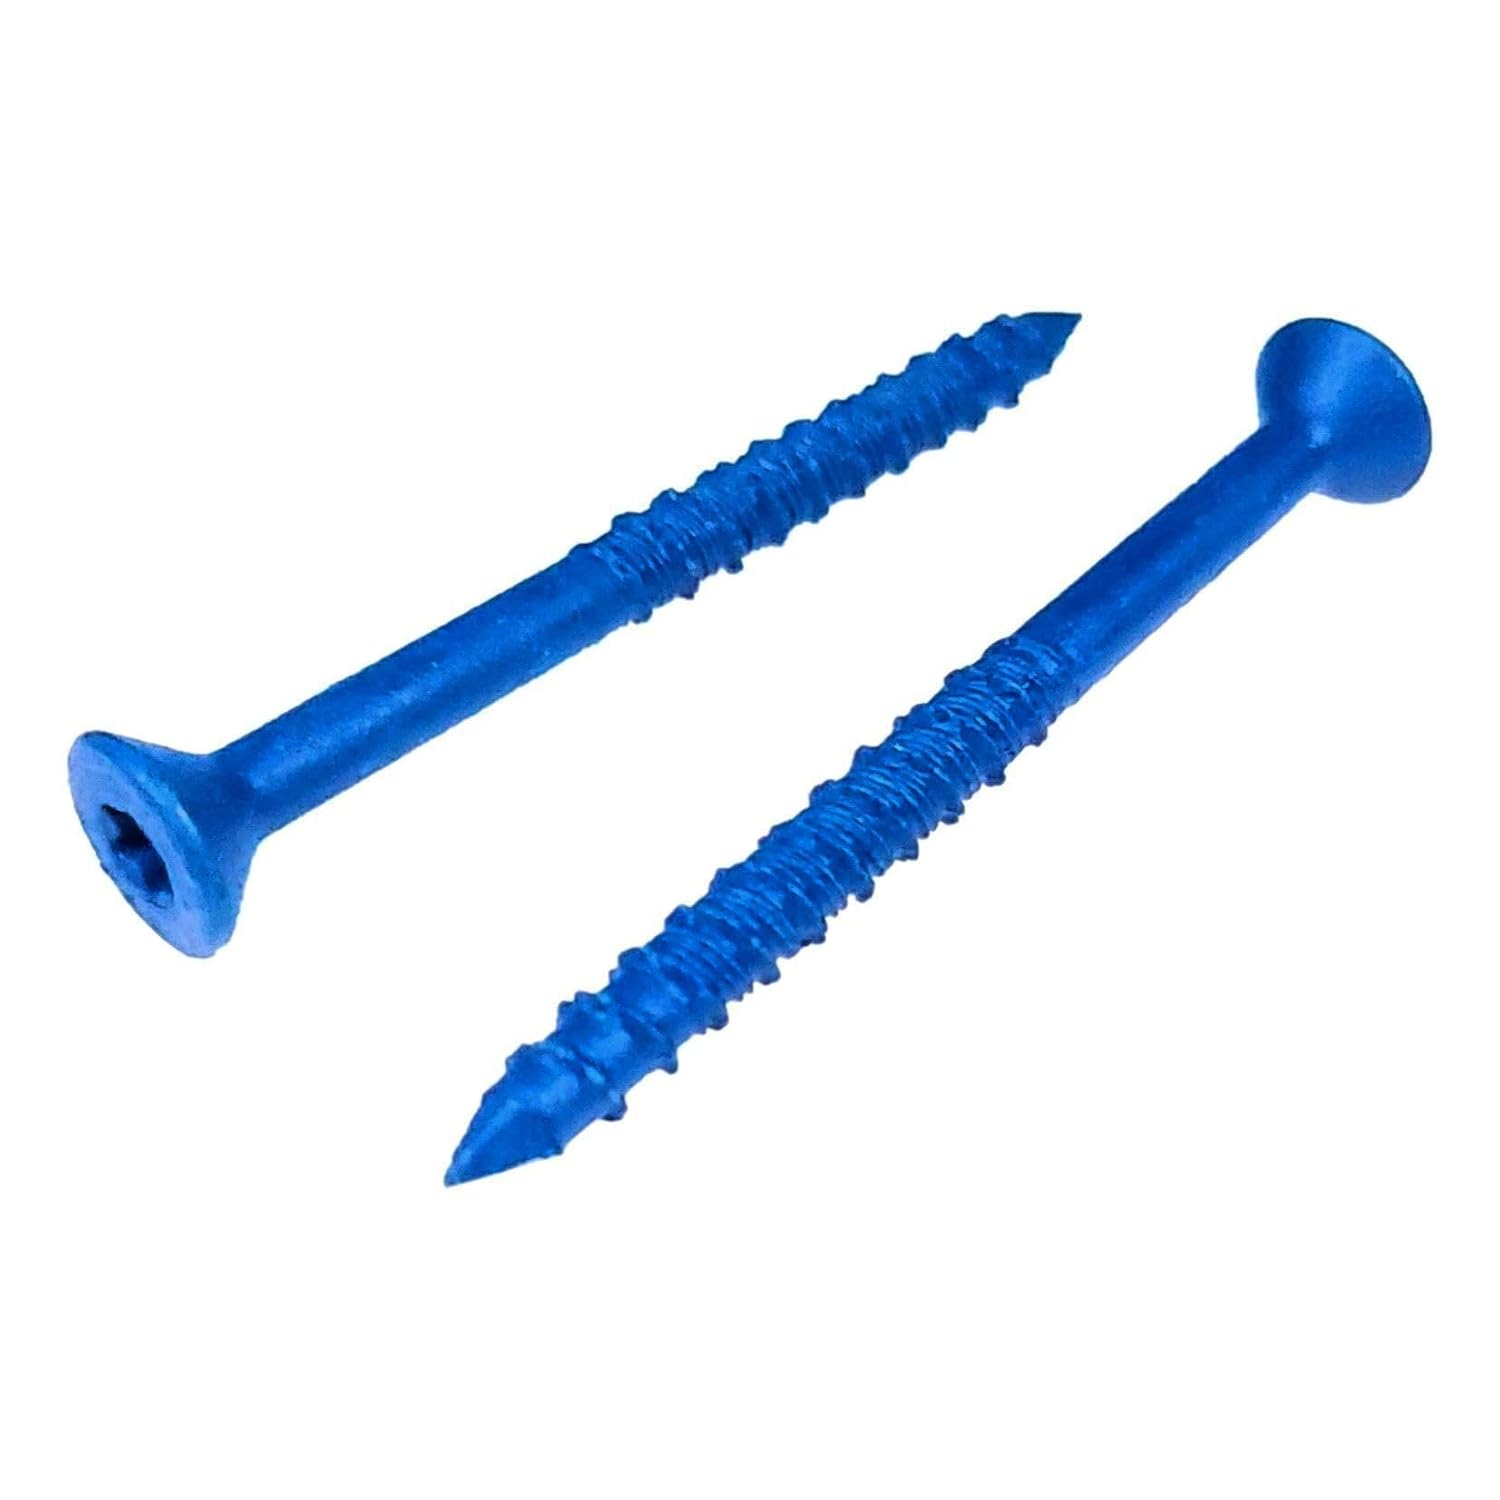
Tapcon concrete screws have been around for decades. They are, essentially, specialized concrete screws. Installation is fairly straightforward: drill the appropriate size hole to a depth about an inch beyond the embedment, then drive the screw in.
While some people complain about Tapcon screws stripping or snapping, that issue is usually caused by using the wrong size fastener or drilling the wrong size hole. Selecting the correct Tapcon depends on your lumber. A concrete screw should be ¾” to 1-¼” longer than the material you are fastening.

The most common lumber used in basement framing is 2x material, which measures 1-1/2” in actual thickness. So, the proper Tapcon screw for a 2x is 2-3/4”. If you are using ¾” lumber, you would use a 1-3/4” anchor.

Make sure you drill the correct size hole. For a ¼” Tapcon, drill a 3/16” hole; for a 3/16” Tapcon, drill a 5/32” hole. Typically, the screws are packaged with the correct bit. In either case, drill about 1-1/2” into the concrete to allow space for dust.  You can find more about the correct size selection in this post

You also have a couple of options. First is size: ¼” or 3/16”. I recommend ¼” because it is less likely to snap and offers better holding power. Then you can choose between hex head or flat head. Hex head works well for plates, while flat head is better for furring strips since it sits flush.

The original Tapcon brand, along with most others on the market, has a coating approved for ACQ-treated lumber.

Find Tapcon And Tools To Install On Amazon

Tapcon Concrete Screws

Tapcon On Amazon

Tapcon On Amazon

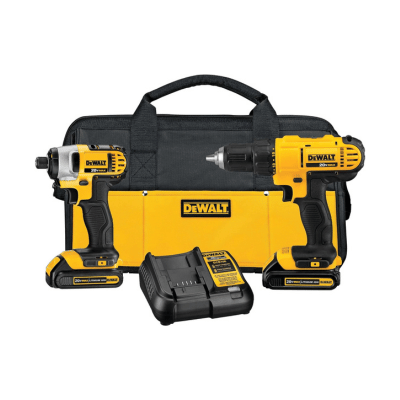
DeWalt Impact Hammer Drill Combo

Hammer Drill/Drivers

Hammer Drill/Drivers

Top Selling

Top Selling

Tools Needed for Installing Tapcon

You will need a hammer drill or rotary hammer to drill the hole for your Tapcon screws. Remember: a 3/16” bit for ¼” Tapcon and a 5/32” bit for 3/16” Tapcon.

Your hammer drill can also drive the screws, but an impact driver does a better job. A ¼” hex Tapcon has a 5/16” head, while a 3/16” Tapcon has a ¼” head. Flat heads typically use a #3 Phillips or T30 Torx for ¼”, and a #2 Phillips or T25 Torx for 3/16”.

The most common lumber used in basement framing is 2x material, which measures 1-1/2” in actual thickness. So, the proper Tapcon screw for a 2x is 2-3/4”. If you are using ¾” lumber, you would use a 1-3/4” anchor.

Make sure you drill the correct size hole. For a ¼” Tapcon, drill a 3/16” hole; for a 3/16” Tapcon, drill a 5/32” hole. Typically, the screws are packaged with the correct bit. In either case, drill about 1-1/2” into the concrete to allow space for dust.

You also have a couple of options. First is size: ¼” or 3/16”. I recommend ¼” because it is less likely to snap and offers better holding power. Then you can choose between hex head or flat head. Hex head works well for plates, while flat head is better for furring strips since it sits flush.

The original Tapcon brand, along with most others on the market, has a coating approved for ACQ-treated lumber.

When to Use Tapcon (Pros and Cons)

Ramset

A Ramset powder-actuated tool is another option for framing your basement. It uses gunpowder (a blank charge) to drive a piston, which forces a nail (or pin) into concrete or masonry. This process is called direct fastening.  There are other makers of this type of tool including Hilti.  You can see a comparison of Ramset vs Hilti if you are planning to use a powder actuated tool.  Most homeowners will end up with a Ramset tool over a Hilti.

Since no pre-drilling is required, it is significantly faster than using a hammer drill and Tapcon screws.

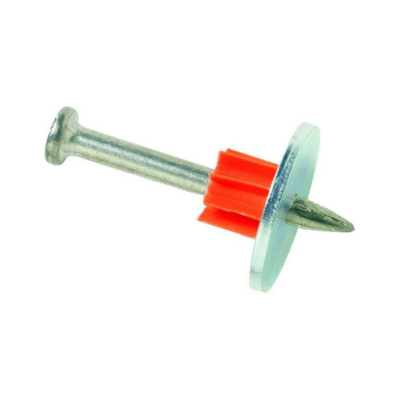
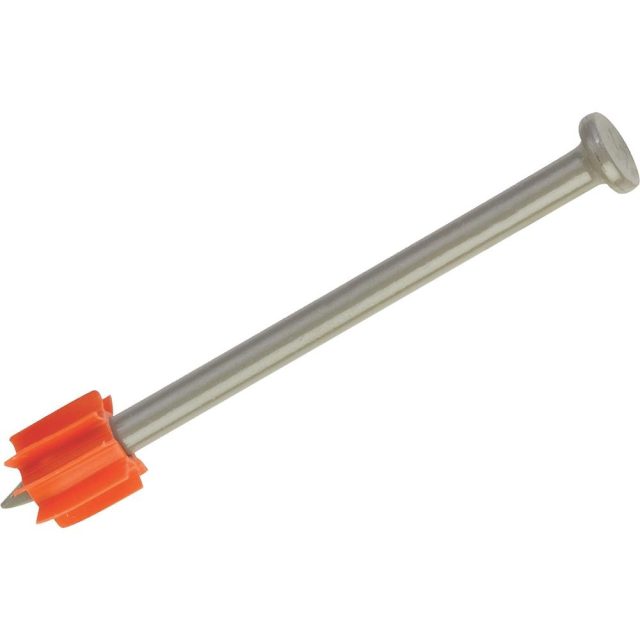
For fastening 2x material to concrete, you need to select both the correct pin length and power level. A general rule is to add about 1” to the material thickness. For 2x material, that means using a 2-1/2” pin. If you are using treated lumber, choose pins with coatings approved for ACQ lumber.

For ¾” material, use a 1-1/2” nail. I prefer pins with washers, as they provide better holding power and help prevent overdriving. However, for furring strips, you may not want a washer.

Selecting the correct power level is important for both performance and safety. Power levels are identified by color:

  • Level 2 – Brown
  • Level 3 – Green
  • Level 4 – Yellow
  • Level 5 – Red

Some tools allow power adjustment, but I recommend keeping the tool at full power and adjusting by changing load levels—it keeps the tool cleaner.

Start with the lowest power level and test. You want the pin to set enough to compress the plastic fluting. Increase power until you achieve the desired result.

Find Ramset And Supplies On Amazon

Ramset Tools

Ramset Tools

Ramset Loads

Ramset Loads

Ramset 2-1/2" Pin

Ramset Nails

Ramset Nails

Additional Capability

One advantage of a Ramset is that it can fasten directly to steel columns and beams. If the steel is at least as thick as the nail, it will work.

When fastening to steel, add ½” to the material thickness. So for 2x material, you would use a 2” pin. Ramset and DeWalt also make 1-7/8” pins with thicker shanks specifically for this application.

Safety

Ramset tools require more safety precautions, including safety glasses, hearing protection, and gloves. OSHA also requires training, which can be completed quickly online.

While many homeowners skip this step, I strongly recommend it—it improves both safety and effectiveness.

What Do You Need to Use a Ramset?

The Ramset tool itself, proper nails/pins, a range of power loads and online training.

When to Use Ramset (Pros and Cons)

Pros of Ramset
  • Fast
  • Easy to use
  • Fun to operate

Cons
  • Specialty tool with limited applications
  • Permanent fastening
  • Loud
  • Training required (though simple)

Final Thoughts

So, what’s better for framing your basement—Tapcon or Ramset?

For small, simple jobs, Tapcon is often the better choice since the tools are useful for other DIY projects. For speed—especially on larger jobs or when fastening to steel—the Ramset is hard to beat.

Tapcon vs Ramset comparison: See the key differences in speed, tools, and best use cases below.

Tapcon vs Ramset: Comparison Chart

Feature Tapcon Ramset
Type of Fastener Concrete screw Powder-actuated nail (pin)
Installation Method Drill hole + drive screw Fire pin into concrete (no pre-drill)
Speed Slower Much faster
Tools Required Hammer drill + driver Ramset tool + powder loads
Ease of Use Easy, beginner-friendly Easy, but requires basic training
Holding Power Higher holding value Good holding value
Removability Yes (removable) No (permanent)
Best For Small jobs, furring strips Large jobs, framing, steel fastening
Works on Steel No Yes
Noise Level Low Loud
Safety Requirements Minimal Higher (PPE + training)
Cost (Per Fastener) Slightly less but more time Slightly higher but less time
Precision High Moderate (can overdrive)


Ramset vs Hilti: Which Powder-Actuated Tool Is Best for Concrete Fastening?

After 30+ years working with powder-actuated tools and concrete fastening systems, I’ve sold and serviced nearly every brand—and moved millions of pins and loads.

If you’re deciding between Ramset vs Hilti, this guide breaks down what actually matters: cost, durability, and real jobsite performance.  Please note:  I am not painting Ramset as an inferior brand by any means.  Ramset simply offers more entry level or low user options compared to Hilti.  I would put a contractor grade Ramset that you would buy from an industrial supplier up against a Hilti with great confidence.

Ramset: Best for Homeowners and Light-Duty Jobs

Why Choose Ramset?

  • Lower cost powder-actuated tools
  • Easy to use for beginners
  • Ideal for occasional concrete fastening
  • Available at big box stores and online readily

Best Use Cases

  • Attaching wood to concrete
  • Basement framing projects
  • Garage or workshop builds
  • Light-duty masonry fastening

Real-World Insight

Ramset tools you find online and at big box stores are more than capable for the tasks most homeowners will perform. The most common issue is using size pin or the wrong powder load—not tool failure.

Ramset HD22
.22 Caliber Hammer Drive

See on Amazon

.22 Caliber Hammer Drive

See on Amazon

.22 Trigger Single Shot

See On Amazon

.22 Trigger Single Shot

See On Amazon

.27 Semi Automatic

Available At Amazon

.27 Semi Automatic

Available At Amazon

Real-World Insight

Ramset tools you find online and at big box stores are more than capable for the tasks most homeowners will perform. The most common issue is using size pin or the wrong powder load—not tool failure.

Hilti & Commercial Grade Ramset: Best for Commercial Concrete Fastening

Why Choose Hilti?

  • Built for daily, high-volume use
  • Extremely durable construction
  • Consistent fastening performance
  • Trusted by professional contractors

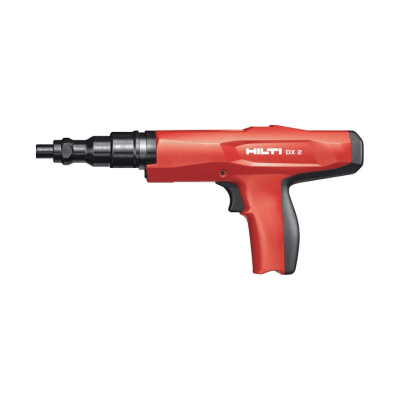
Hilti DX-2

More On Amazon

Hilti DX-2

More On Amazon

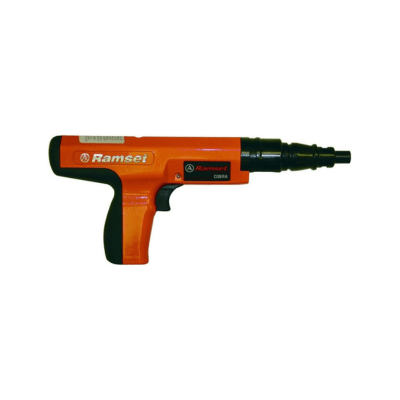
Ramset Cobra (Contractor Grade)

More On Amazon

Ramset Cobra (Contractor Grade)

More On Amazon

Best Use Cases

  • Commercial framing
  • Steel-to-concrete fastening
  • High-volume construction sites
  • Industrial applications

Real-World Insight

Hilti tools excel under constant use. While they can be used for DIY, the cost is often hard to justify unless you’re doing frequent or heavy-duty work. The same is true of true commercial grade tools from Ramset.

Ramset vs Hilti Comparison

Feature Ramset Hilti
Price Affordable Premium
Durability Moderate to High Extremely High
Ease of Use Beginner-Friendly Professional-Grade
Best For Homeowners, DIY Projects Contractors, Daily Use
Performance Great for Occasional Use Best for Continuous Use

Choose Ramset if:

  • You’re a homeowner or DIYer
  • You need a tool for occasional use
  • You want a lower-cost option

Choose Hilti if:

  • You’re a contractor
  • You use the tool daily
  • You need long-term durability and consistency

Pro Tip: What Matters More Than the Brand

Load selection and pins selection is critical.

Using the wrong power level or pin can cause misfires, overdriven fasteners, or weak holds. This is the most common mistake across both brands.

Conclusion

If you’re doing light-duty or occasional concrete fastening, Ramset is a cost-effective and reliable choice. View a video on the basic Ramset HD22.  Or learn a little more about the Ramset Mastershot.   Again, please note Ramset does have a line of commercial grade tools available through industrial supply channels.

If you’re working in commercial construction or using the tool daily, Hilti delivers superior durability and long-term performance.  One 

Ramset vs Hilti: Bottom Line

Homeowners: Go with Ramset.

Contractors: Invest in Hilti or commercial grade Ramset.

Power users: Contractor-grade Ramset can bridge the gap.

Frequently Asked Questions

Is Hilti better than Ramset?

Hilti tools are more durable and built for daily commercial use, while Ramset tools are more affordable and ideal for homeowners and occasional projects.

What is the best powder-actuated tool for concrete?

For most homeowners, Ramset is the best choice due to cost and ease of use. For contractors or heavy-duty applications, Hilti provides better long-term performance and durability.

Can homeowners use Hilti powder-actuated tools?

Yes, homeowners can use Hilti tools, but the higher cost usually isn’t justified unless you have frequent or demanding fastening projects.

Why do powder-actuated tools fail?

Most failures are caused by using the wrong powder load strength rather than the tool itself. Proper load selection is critical.

Is a Ramset strong enough for basement framing?

Yes, Ramset tools are more than strong enough for typical basement framing and light-duty concrete fastening applications.


Using The Ramset Master Shot Tool For Framing Your Basement

Ok, so you want to frame your basement and you want to use a powder actuated tool like a Hilti or Ramset tool.  What kind of tool should you get, how much will it cost and how in the world do I use it?  Well here is a little guidance for you.  One of the more popular tools for a homeowner to use for framing is the Ramset Mastershot tool.  You will also find the same tool marketed by ITW Brands.  This is a good tool for getting your a basement project.  If you are going to do this for a living, spend more on a true contractor grade tool with readily available replacement parts.   The Ramset Mastershot will handle your basement project just fine.  So what do you need?

What You Need To Use The Ramset Mastershot Tool

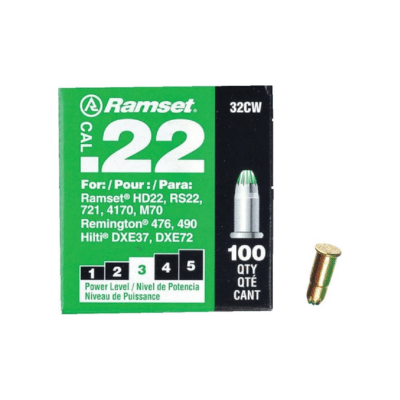
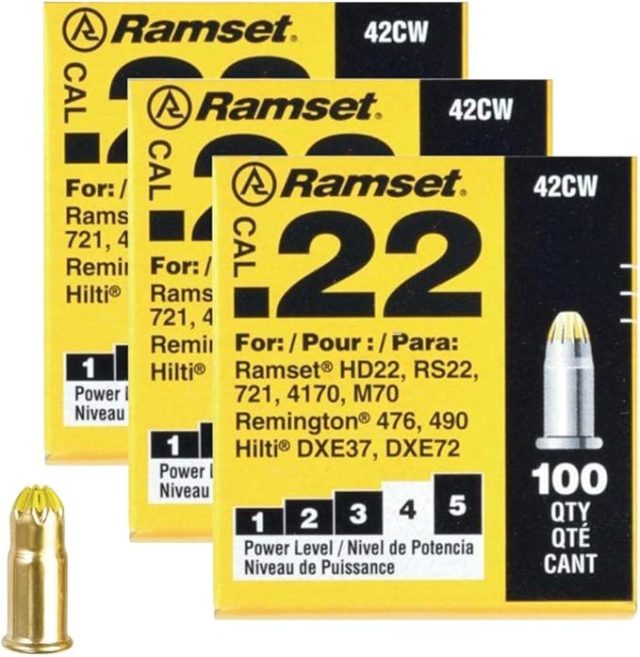
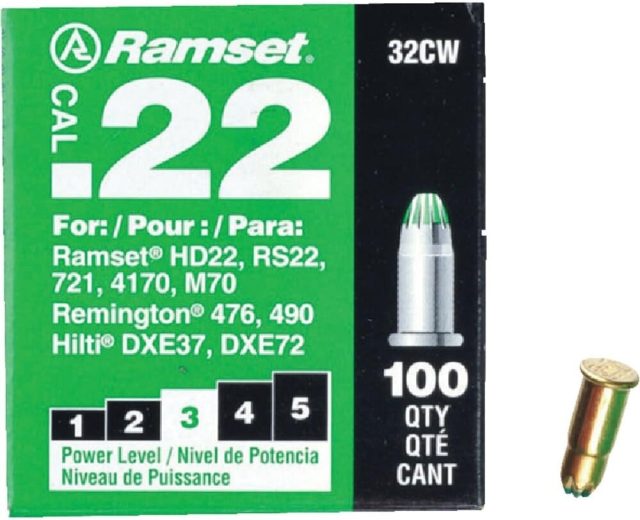
First the tool of coarse.  Expect to pay around $100 or so on Amazon for the Ramset Mastershot Tool.  The nail you want to use for fastening 2x material to concrete is a 2-1/2″ nail.  A nail with a washer will increase the bearing area on the 2x but not required.  What is required for mounting treated lumber is a nail that is compatible with treated lumber.  Use a Ramset part number 1516SDE (with washer) or a Ramset 1516E.  Both have a coating (Ramguard) for use with treated lumber.  If you are going to mount a 2x to a steel beam, I would recommend the Ramset SP178 pin. It does not have a coating so don’t use it with treated 2x material.  You will need powder loads or charges as well.  The theory is use the lightest power load needed to sink the fastener.  The loads are numbered and color coded as follows:  Power Level 3 GREEN, Power Level 4 YELLOW and Power Level 5 RED.  These are the most common loads.  You will likely use yellow, but it is a good idea to start low and work high.  Red may be needed shooting to steel.  These are all .22 caliber.

Ramset Mastershot

Ramset .22 caliber loads charges

Ramset Loads

Ramset Nails For 2x

Nails For Ramset

Firing The Tool

Firing is simple.  I recommend watching the video as it will show you all the steps in the correct order.  First with you safety gear on, safety glasses and hearing protection, load the nail into the end of the tool.  Now select your charge, starting again with a lower level.  Place the tool against the work surface at a right angle (you can’t toenail with the tool!) press the tool down and then pull the trigger.  Pull out the front barrel and repeat the process.  Pin first, load second.

SAFETY FIRST!

Safety when using any powder actuated tool including the Ramset Mastershot tool is a priority.  You should go to Ramset.com and take a simple test for certification.  You will definitely want safety glasses and hearing protection.  Consider the work environment as well.  Make sure there are no flammable fuels in the area and everyone knows what you are doing.  The tool is a gun that shoots nails into concrete and it sounds like one.  Please take the time to visit the site and get certification.


vega-driver.jpg

What Do You Use A Torgue Limiting Screwdriver For?

When it comes to achieving optimal results in assembly and repair work, precision is key. A torque limiting screwdriver is a crucial tool for professionals and hobbyists alike, designed to ensure that screws are tightened to the exact specifications required. This article explores what a torque limiting screwdriver is, its benefits, and the various applications where it excels.

What is a Torque Limiting Screwdriver?

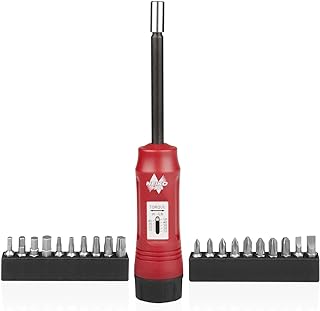
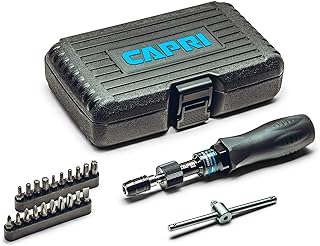
A torque limiting screwdriver is a specialized tool used to apply a predetermined amount of torque to a screw or fastener. Unlike a standard screwdriver, which relies solely on the user’s hand strength and feel, a torque limiting screwdriver incorporates a mechanism that disengages or slips when a specified torque level is reached. This feature prevents over-tightening and ensures consistent and accurate fastening.

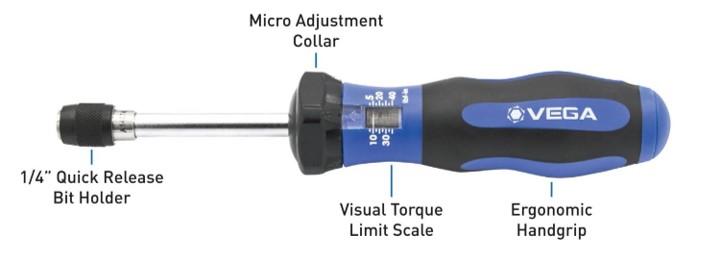
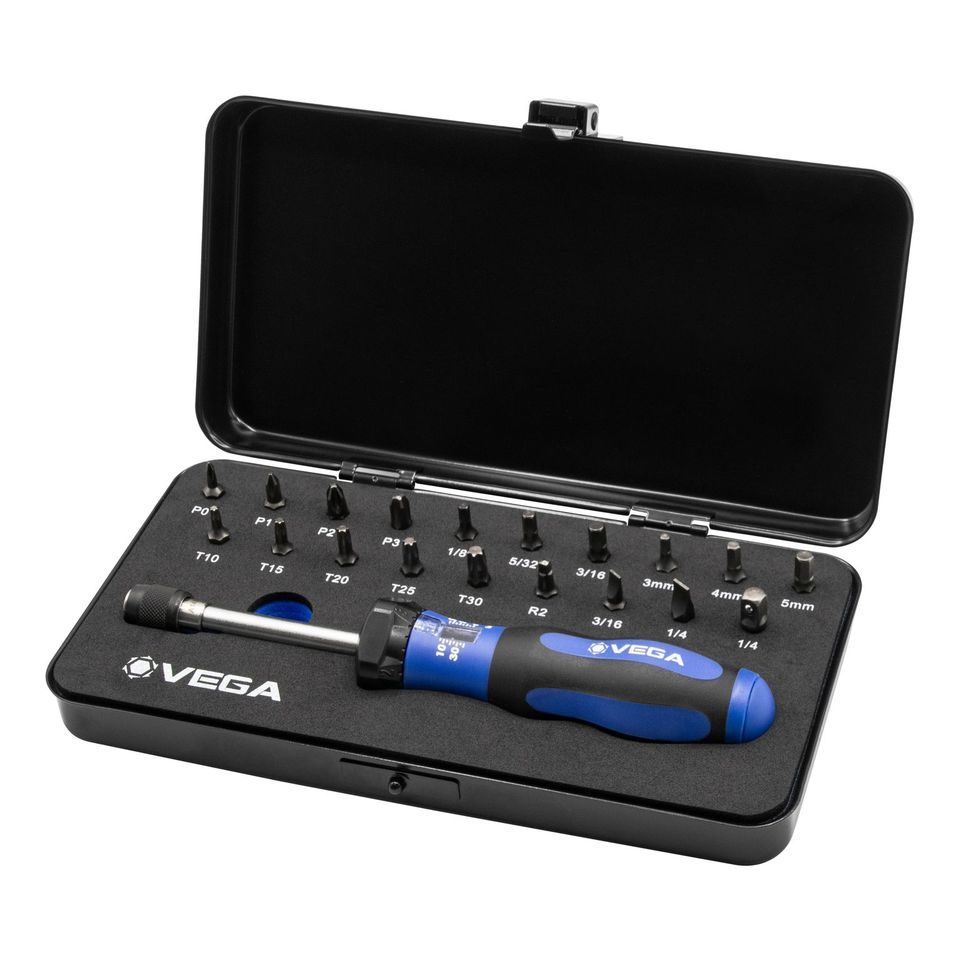
Vega TLS-20 Torque Limiting Screwdriver
Vega Torque Limiting Screwdriver

Torque Limiting Screwdrivers On Amazon

Benefits of Using a Torque Limiting Screwdriver

  1. Precision: One of the primary advantages of a torque limiting screwdriver is its ability to deliver precise torque settings. This precision is crucial in applications where specific torque values are essential for the integrity and performance of the assembly.
  2. Consistency: With a torque limiting screwdriver, every screw is tightened to the same torque specification, which improves the consistency of the assembly process and helps maintain uniform quality across multiple products.
  3. Preventing Damage: Over-tightening screws can lead to damaged components, stripped threads, or even breakage. A torque limiting screwdriver helps mitigate these risks by stopping the application of torque once the set value is reached, thereby protecting sensitive materials and ensuring proper assembly.
  4. Enhanced Safety: By controlling the amount of torque applied, these tools reduce the likelihood of accidents caused by excessive force. This is particularly important in high-precision or high-stakes environments.

Applications of Torque Limiting Screwdrivers

  1. Electronics and Electrical Work: In electronics and electrical assembly, components such as circuit boards and connectors require precise torque settings to avoid damage and ensure proper function. A torque limiting screwdriver helps maintain the delicate balance needed for reliable electrical connections.
  2. Automotive and Aerospace Industries: In the automotive and aerospace sectors, maintaining the correct torque on fasteners is critical for safety and performance. Torque limiting screwdrivers are used for assembling engines, chassis, and other critical components where precision is non-negotiable.
  3. Manufacturing and Assembly Lines: On assembly lines, consistency and efficiency are paramount. Torque limiting screwdrivers streamline the assembly process by providing uniform torque across numerous fasteners, which enhances both the speed and quality of production.
  4. DIY and Home Improvement: For DIY enthusiasts and home improvement projects, a torque limiting screwdriver can be an invaluable tool for assembling furniture, installing fixtures, or working with delicate materials. It ensures that screws are neither too loose nor too tight, leading to better results and longer-lasting projects.
  5. Medical Devices and Instruments: In the medical field, precision is crucial, especially when assembling or repairing medical devices and instruments. Torque limiting screwdrivers help ensure that these critical devices are assembled correctly, meeting strict safety and performance standards.

How to Choose the Right Torque Limiting Screwdriver

When selecting a torque limiting screwdriver, consider the following factors:

  • Torque Range: Choose a screwdriver with a torque range suitable for your specific needs. Different applications require different torque settings.
  • Build Quality: Opt for a tool made from durable materials to withstand frequent use and maintain accuracy over time.
  • Calibration: Ensure that the screwdriver is properly calibrated and check for calibration certificates if precision is critical.
  • Ease of Use: Look for a design that is comfortable to handle and easy to use, especially if it will be used frequently.

Top Sellers On Amazon

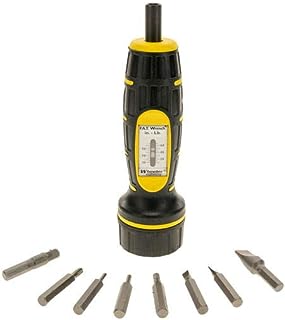
Top Rated Torque Limiting Screwdrivers On Amazon

Top Rated Torque Limiting Screwdrivers On Amazon

Top Rated Torque Limiting Screwdrivers On Amazon

Top Rated Torque Limiting Screwdrivers On Amazon

Top Rated Torque Limiting Screwdrivers On Amazon

Top Rated Torque Limiting Screwdrivers On Amazon

Conclusion

A torque limiting screwdriver is more than just a tool; it’s an investment in precision, consistency, and quality. By providing exact torque settings and preventing over-tightening, it enhances the reliability of your work and ensures that every assembly is performed to the highest standard. Whether you’re working in a professional setting or tackling a DIY project, incorporating a torque limiting screwdriver into your toolkit is a smart choice for achieving exceptional results.


gopher-pole.jpg

If you are looking for a Gopher pole, use the one that is the choice of installers and has been for decades.  The  90520 Gopher pole made by SECO.  I have been selling power tools and fasteners to the trades since 1995 with a large customer base in the voice and data cabling field.  This is the gopher pole of choice!  The pole has been a little harder to come by over the years as some of the big suppliers have made it a secondary offering of Gopher poles.  I still have customers ask me “do you guy’s stock that white gopher pole?”.   No doubt this is still the tool of choice

Crain 90520 Gopher Pole

FREE SHIPPING!

Stats Of the Crain 90520 Gopher Pole

Even though the pole is heavy duty, it is still lightweight coming in at just 4 pounds.  Collapsed the pole is 52” but can telescope out to a full 22’ feet.  That’s where the light weight of the Crain Gopher Pole really shines.  It’s simply so much easier to handle when you are pushing and pulling poles over long spans.  The diameter of the pole is 2” so it fits your hand as well as into tight spaces.  The rigid white fiberglass is super durable, and it will serve you for years

Fully Assembled

The SECO 90520 Gopher Pole is fully assembled.  While some gopher poles have special interchangeable ends, which no doubt have their place, the Crain gopher pole doesn’t have different pieces to keep track of.  The pulling end of the pole has a metal hook that you can form if need be or tape your cable to if you prefer.  There is also a ring you can tie your cable or pull string to as well.

Where To Buy The Crain 90520 Gopher Pole

As mentioned earlier, the pole has become harder to find.  Buy it here with free shipping!   Again, if you are looking for the Gopher pole of choice that will serve you for years, the Crain 90520 is my recommendation.


Untitled-design-6.jpg

I have been selling nuts, bolts and fasteners for almost 30 years.  For the most part our fasteners are 1/4-20 through 1-8 coarse thread fasteners so matching thread is usually pretty straightforward.  However, from time to time a customer comes in with a fine thread or maybe a metric that I will have to order in for them and the guessing game starts.  I had a plastic gauge that you could match the thread up with but it wasn’t always easy to get the correct match.  Plus if you had a nut, there wasn’t a way to match up the threads.  Recently I had a customer come in with a bolt that I wasn’t sure if it was metric or fine thread.  So finally after almost 30 years, I decided to do this the easy way.  I ordered a thread finder set from Amazon.  And what do you know, I used it 3 times in the first week or two!  It now hangs on my showroom wall and it not only makes my job easier but helps me take better care of my customers.

Thread finder for nuts and bolts

Fast Delivery From Amazon

The Bolt/Screw Thread Finder I Ordered

There are several thread size finder for nuts bolts and screws available on Amazon.  I chose one that has both standard and metric thread.  The one I chose has a male and a female end so finding thread size on either a bolt or nut is super easy.  The set has both metric and standard threads and are clearly marked.  The gauges are all strung together on a cable with a loop on either making it easy to hang on your wall for easy access.  They are also available in a few different sizes so if you typically using just smaller bolts and screws the 26 piece set would do well but they also offer a 34 piece set as well as a 44 piece set.   The standard are in a chrome finish and the metric is in a black finish.

Why A Thread Finding Gauge Is Worth It

I can justify the price of a thread size gauge with one word, time.  And I am not just talking about the ability to get correct thread size in a few seconds.  Consider a real life example.  You are mounting a mounting a television and you need longer screws to screw into the back of your tv.  So you take a guess, drive to the hardware and grab a few screws.  Ooops, close but not right, they must be metric.  Back you go and try again.  You get the idea.  No consider you may have to order the screws online.  Wouldn’t it be nice to get the right one the first time?  In my opinion having the gauge finder is money well spent.

How To Measure Bolt And Screw Length

Now that we have the correct thread count, here is how to get the correct length of a screw or bolt.  The length of hex bolts and screws as well as pan head and roundhead bolts and screws are measured from underneath the head.  Counters sunk (flathead screws) are measured from the top of the screw.  So with the the help of your thread finding gauge and knowing how to correctly measure length, you can order up the correct screw first try!


cordless1214impactdriver18vboschGDX18V1800lag2.png

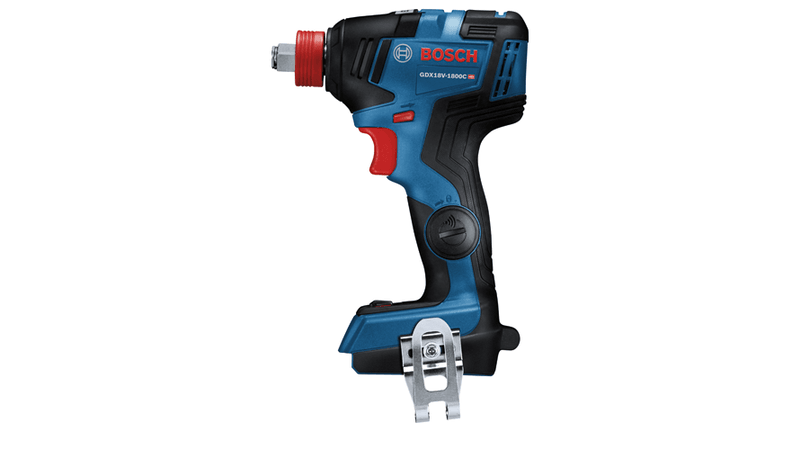
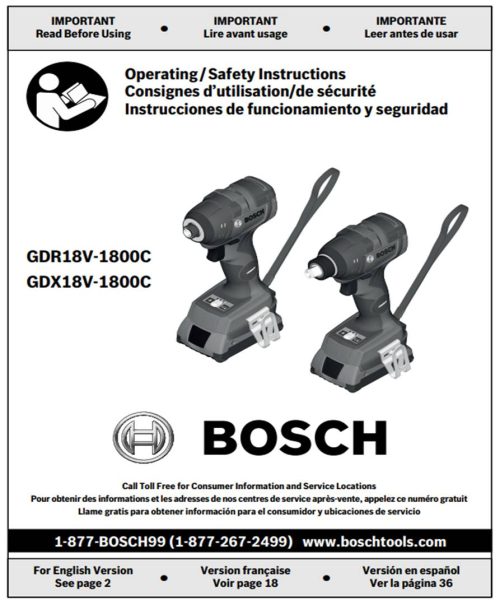
The Bosch GDX 18V EC  impact driver is a great choice for an 18V impact driver.  I want to share a few features of the tool that are unique to Bosch, one in particular that I really like that simply isn’t on  any other 18V impact drivers.

Check Price On Amazon

My Favorite Feature The Bosch GDX 18V EC Impact Driver

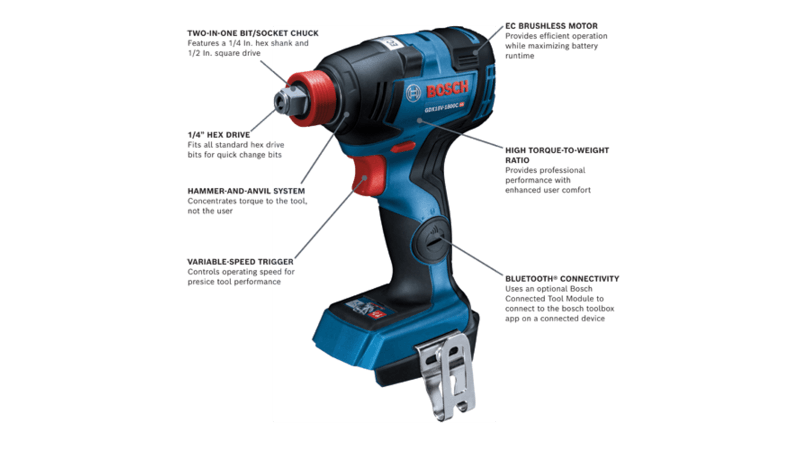
Usually I like to save what I think is best until last but I want you to consider what I think is one of the standout features of the Bosch GDX 18V EC, the 2 in 1 bit socket driver.  While most impact drivers use a ¼” hex chuck for nut setters, the Bosch has a ¼” chuck socket for that but it also accepts ½” sockets.  This is currently the only impact on the market that does both.  So what does that mean to you?  That means you can use the ¼” drive nut setters that most of us have laying around, usually ¼”, 5/16”, 7/16” & 3/8”.  It also means you now can use your standard ½” drive sockets from your ratchet set.  That includes all the sizes, standard and metric, standard and deep sockets, swivels and extensions.  You can do all of this without having to use an adapter.   One real problem with socket adapters is that you still have a very thin shank on the ¼” shank so with larger bits, adapters can easily snap.  And I don’t know about you but where did I put my adapter.   That is why I think the 2 in 1 chuck of the Bosch GDX18V is the most important feature.

Click Images To Check Current Price On Amazon

Specifications For The Bosch GDX18V EC

Ok, so here is the technical information from Bosch that shows that the tool isn’t just a clever idea, it’s built to work.  First off, what does the EC stand for?  EC stands for electronically controlled brushless motor.  While brushless motors have been the norm for some time now on impact drivers, it’s nice to know you have the power and speed.    As for power, you are looking at 1,800 inch pounds of torque.  I have never played with the feature but if you want you can download the app and fine tune the tool.  The chart below covers the specifications of the tool.  Please note that there is also versions of the tool that are Bluetooth enabled if you are interested.  These will have “connected” in the name.  A separate module must be purchased separately.  I can live without the Bluetooth.

Specifications
  • Lithium Ion Battery Powered
  • 1/4″ Hex + 1/2″ Square Drive
  • Height in 8.2″
  • Length in  5.8″
  • No Load RPM  0-1,100 / 0-2,300 / 0-3,400
  • Forward & Reverse
  • Torque 1,800 (in. lbs.)
  • Variable Speed
  • Weight 2.6lb
  • Width in               3.0″
  • Works With Bosch Bluetooth® Connectivity Module GC42

Check Current Price On Amazon

Check Current Price On Amazon

What Is Included With The Bosch GDX18V EC Tool

The GDX18V EC is available in several configurations including a bare tool that just has the tool, a few bits and a belt clip.  From there you can find it with different capacity batteries, all 18V chargers and a case as well as a few nice combo kits.  To make the tool even more valuable, the tool has a 5 year warranty on the tool and the batteries and chargers have a 3 year warranty.  You will need to register the tools with Bosch but that is super easy and well worth it.

If you are looking for an 18V impact driver, the Bosch GDX18V EC deserves at least a look.  If you already have Bosch 18V tools, it’s a no brainer.  If you don’t, well, maybe a nice little combo kit with impact driver will make you a died in the wool Bosch fan.

Bosch GDX18V EC

Click For GDX18V EC Manual


31w5xHqugyL._AC_SL1000_.jpg

If you have just a little bit of framing to do in your basement and you hate the idea of drilling in the concrete with a hammer drill and using Tapcon, the Ramset HD22 single shot powder actuated tool may be an option for you.  This is an inexpensive tool readily available on line that will fasten your 2×4 to concrete quickly and safely.  Here is what you need and how to do the job with the HD22.  Please note the tool is also known as the ITW Ramset 00022 HammerShot.  Search either one on Amazon and you will find them.

RAMSET HD22

Check Price On Amazon

Check Price On Amazon

What You Need To Fasten 2 x 4’s To Concrete With The Ramset HD22

Well of course first thing you need the tool.  After that, you will need to select the proper pin for you application.  If you are shooting down 2x material to concrete, you will use a 2-1/2” pin.  If the lumber is treated, make sure you use the Ramset 1516SDE nail as the chemical treating can interact with a standard pin.  For loads, you have 3 power levels to choose from.  Starting with the lowest level you have brown, green and then yellow.  The idea is to start with the lowest power level and work up to the level required.  If I could only pick one load, it would be yellow and then probably green.  You will also need a hammer to actuate the tool.   Two very important things that many times get overlooked are safety glasses and hearing protection.  Please don’t overlook either of these!  Technically, you need complete a simple online license test.  It’s very simple and easy but I am pretty sure not many DIY are doing it.  But now you know.  Here is the link  for Ramset Licensing.

Get What You Need On Amazon Click Image

RAMSET HD22

Ramset Nails For 2x

The Process Of Fastening The 2 x 4

The fastening process is fairly straight forward.  I was always taught load the nail first then add the charge.  The official video shows load the charge first and then the pin, the manual shows nail first and then load the charge.  Well, I was a certified Ramset instructor for years and we always taught nail first then the power load.  I would rather load the nail in the end of an unloaded tool than vice versa.  Now position the tool on your work surface and strike the end of the end of the tool deliberately.  Bang you are done!

The Ramset HD22 (again also known as ITW Ramset 00022 HammerShot) is a tool designed for limited use.  You won’t find replacement parts for the tool but the cost is so low that if you just need it now and then it may be the right tool for you.  If you do basement framing on a routine basis, consider stepping up to a semi-automatic tool that uses a 10 shot strip of loads and has replacement parts available for faster fastening and longevity.

Ramset HD22 Hammershot Manual


718QXV3sTdL._AC_SL1500_-1280x720.jpg

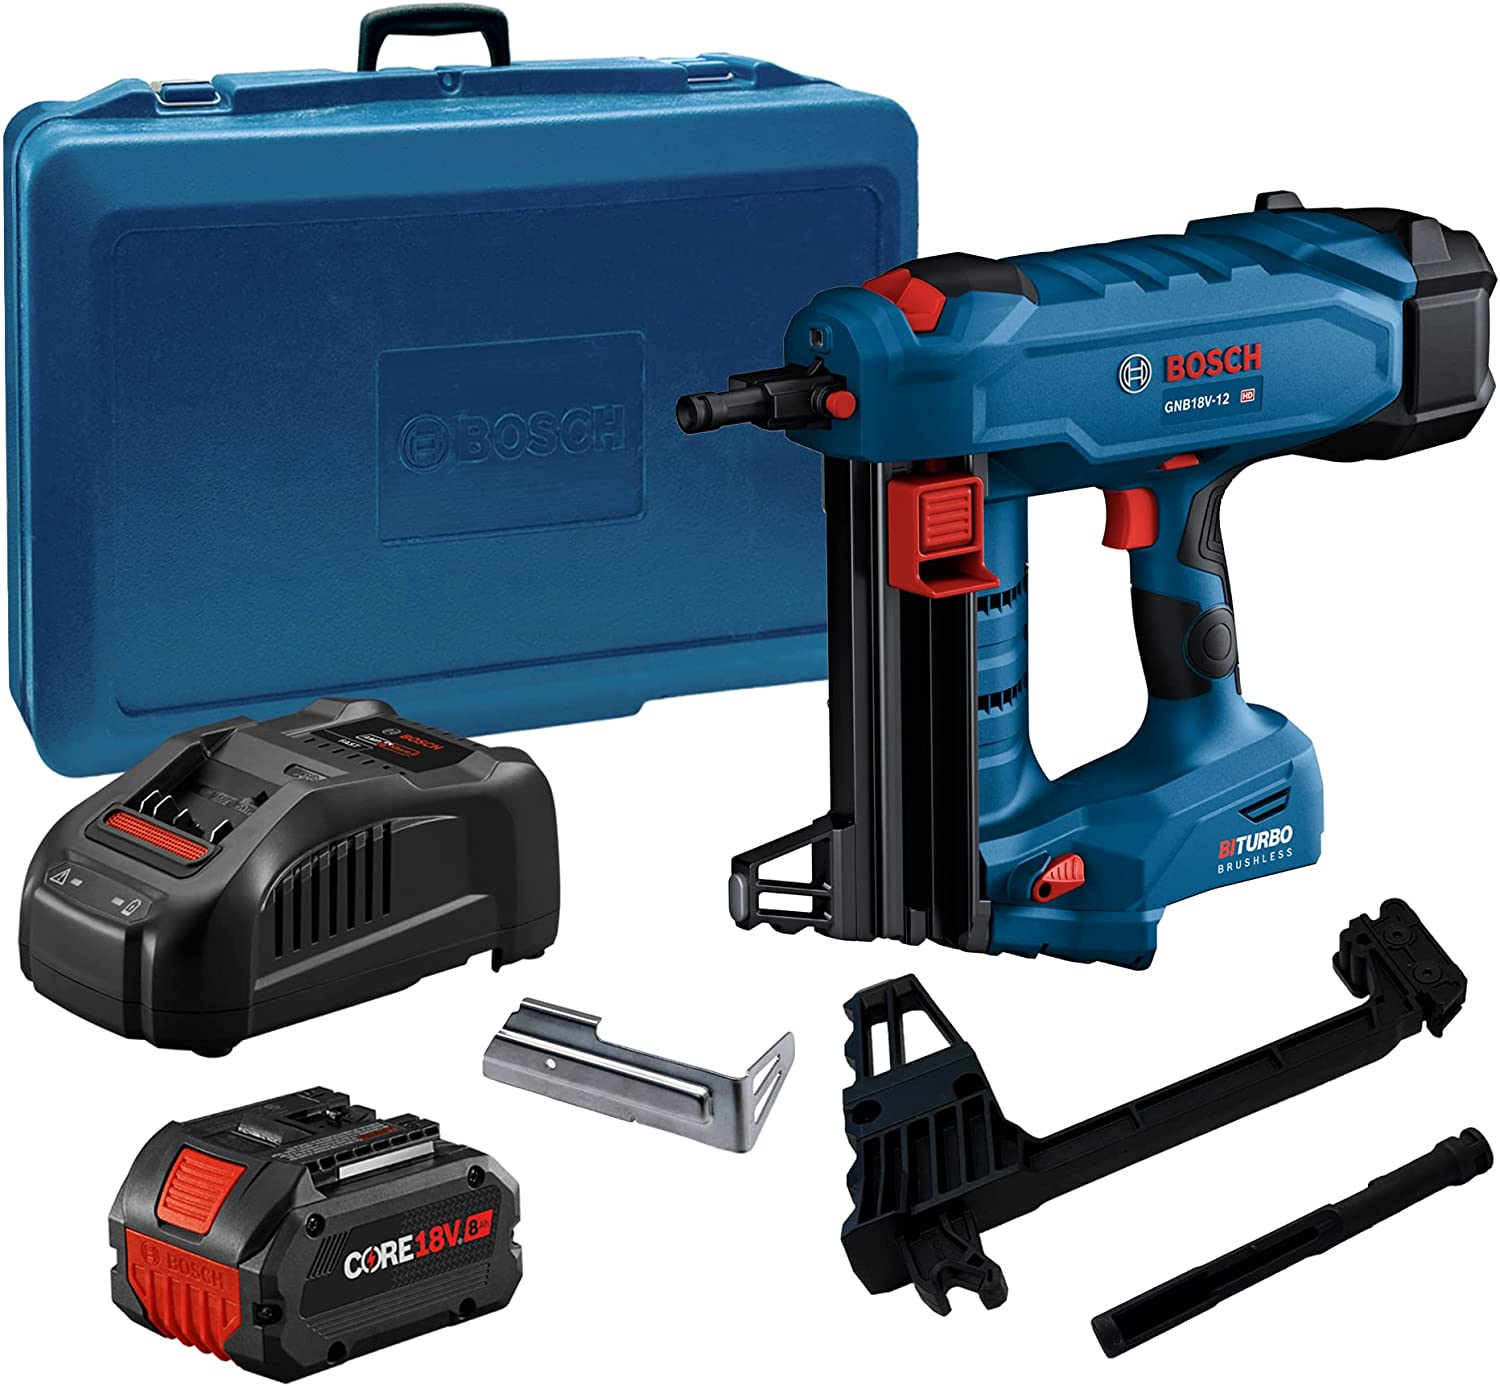
The BOSCH GNB18V-12K14 18V concrete nailer is Bosch’s entry into the direct fastening market.  The tool is designed to fasten to concrete and steel using an air spring design.  Battery concrete nailers are somewhat new.  Hilit was one of the first followed by DeWalt and now Bosch.  Battery powered concrete nailers require no fuel cell or powder charges so there are instances where this will be the tool of choice.

Bosch concrete nailer

Check Price On Amazon

Bosch GNB18V Specs And Capacities

Bosch GNB18V Concrete nailer

See Video On Amazon

See Video On Amazon

The BOSCH GNB18V tool weighs in at 9 pounds and is just under 16” long and about 5-1/2” wide. The included magazine can handle up to 22 nails in lengths from ½” up to 1-1/2”. An optional 44 nail magazine is available for the tool. One thing unique to the Bosch battery concrete nailer is that you can take off the magazine and shoot single shot nails that you would typically shoot in powder actuated tools. Think of ceiling clips, EMT clips, studs and more. The tool uses an 18V lithium battery. Any of the current Bosch 18v batteries will slip into the concrete nailer but an 8.0 mah is recommended and included in the kit. Smaller mah batteries will run the tool and you will save weight but sacrifice run time. Bosch has nails for both concrete and steel applications. The NB series is for concrete and the NM series is for metal and are packed in boxes of 1,000.

What’s Included In The Kit

The Bosch battery nailer, part #GNB18V-12K14 is comes with the tool, 22 nail magazine, single shot nosepiece, 8.0 mah 18V lithium battery, charger, utility hook and case.  If you already have a collection of Bosch 18V batteries and chargers, you can buy the tool bare, part #GNB18V-12N.  The bare tool does not include the battery, charger or case.

Applications For The BOSCH GNB18V Tool

Probably the most common application for battery powered concrete nailers is drywall track to concrete.  It is also a good choice for shooting to concrete block as you don’t have the blowout issues you have with powder actuated tools.   As mentioned above, switching to the single shot nosepiece allows you to shoot single shot PAT pins including ceiling clips, EMT assemblies, tie wrap mounts, studs and more.  This really opens up the uses for the tool.  The Bosch BOSCH GNB18V-12K14 is a nice entry for Bosch into the direct fastening market.  See current price on Amazon.


TOOLANDPROJECT.COM

Tools, projects, fun.

WWW.TOOLANDPROJECT.COM

contact@toolandproject.com

blogging

From MN