
TOOLANDPROJECT.COM features references to products from one or more of our advertisers that we may receive compensation at no expense to you as a user. You can see more on our privacy policy page.
Here is a simple to build DIY fireplace mantel that you can build with minimal tools and time. It has a rustic look that will fit in to many types of décor. The mantel is build from standard lumber and utilizes a product from Simpson Strongtie called architectural accents that really set it off. This DIY fireplace mantel is offers a little more character than some I have seen of late and is every bit as easy to build.
What You Will Need
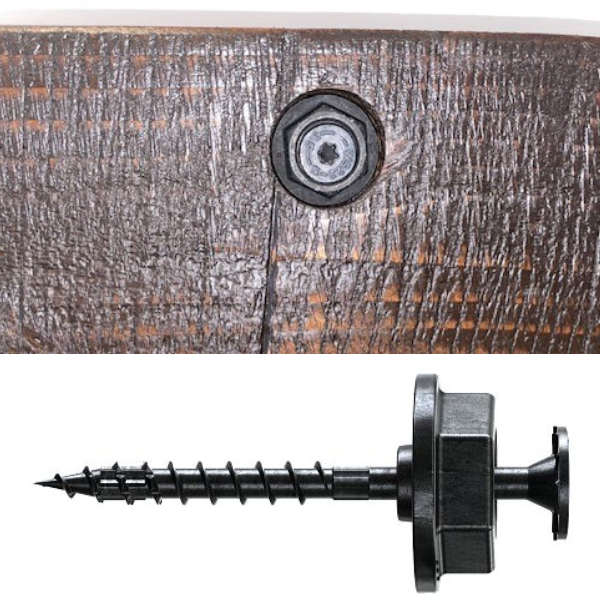
For this project you will need four 2×8 boards at 6’-8’. You could go with a couple at 10’ but shorter boards may have less twist and imperfections. Choose wisely! You will need a 2×4 for mounting and some 2-1/2” construction screws like GRK or others as well as maybe some 3-1/8” ones. For mine, I added 6 of the Simpson hex washer nuts so you will need 6 of them as well the corresponding screws to mount them. As for tools, you should have a table saw, a jig saw and or a circular saw, a sander, level, cordless drill or impact and clamps.
Cutting The Parts For The Mantel
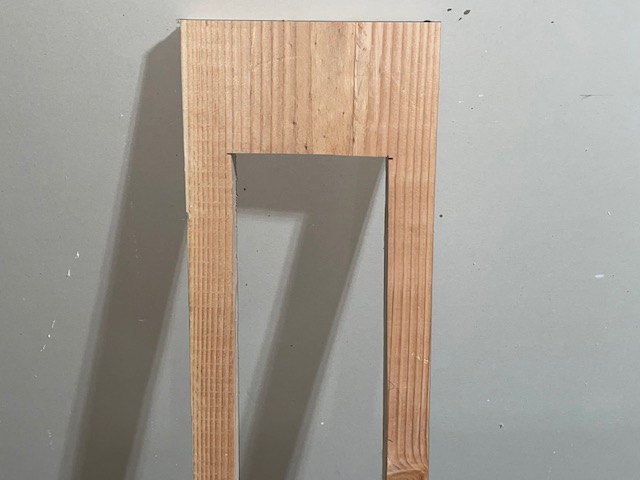
This DIY fireplace mantel really is a simple project. The depth of the mantel will be 6” with the four 2×8 stacked up. I made mine 7” tall which seemed to be a nice balance. As for length, I had a corner area that dictated the length at 52”. Of course you can build to suit. The first thing I did was cut the four 2×8 a little long, maybe 56” or so and then squared them up on the table saw. I suppose you could do it with a circular saw if you have a straight edge. I actually fastened my boards to a piece of mdf shelfing overlapping by a ¼” or so to get a nice straight edge. After that I ripped the boards all to 7” and cut them to my finish length. I then picked the board that I wanted for the front and set it aside. The other three boards will need to have the center cut out for weight and mounting. I cut out the center of these boards leaving a 1-1/2” boarder on the top and bottom on the long sides and 4 or 5 inches on the short side. A circular saw worked well for the long cuts and then I cleaned it up with my circular saw.
Assembling The Mantel
The first thing I would do is mark where I am going to recess the decorative nuts with my forstner bit so I don’t put a screw in there. I forgot to do this on mine and hit the screw and chipped my bit. After that I laid the full board face down applied glue and positioned the first recessed board on top of that. I clamped it in place and when I was happy with the position, I screwed that board in place with 2-3/8” screws, removed the clamps and repeated the same for the following two boards. Spend a little time aligning the boards to reduce any sanding. I had mine pretty close so sanding was minimal. One thing I noted as I fastened my boards together was some cracking here or there. It really wasn’t a big deal. I filled them with putty and sanded before staining.
Adding The Hardware
The recessed decorative bolts and the distressed face of this diy fireplace mantel is what really makes this project stand out and it is so easy to do. The first thing I did was layout the location of my holes. The choice is yours as to how it would layout. Don’t worry about the screws that hold on the decorative nuts hitting the void. If it looks like they will, just install them after the mantel is hung on the wall and the screws will go into the mounting board. I used a 1-1/2” forstner bit to make the holes. I just did a little at a time to get the depth I wanted . You could use a hole saw but you will have to break out the center and the nuts may not sit straight. You can leave the nut sticking out as well if you want a different look.
Giving Your Mantel A Rough Cut Look
Now here comes the fun part. I can’t take credit for this idea, I found it on youtube. It was so easy to do. Using a reciprocating saw, you drag the saw backwards at an angle along the length of the mantel. I think I used a 10 TPI blade. I did one test piece and then my mantel. I did it from both side of the mantel to make sure I got the affect across the entire face. You can start and stop, speed up or slow down to give the face different looks. I also did the top and bottom of the mantel. This is such a cool technique that I am looking for other projects to use it on.
Finishing The Piece
I finished the mantel using an oil based stain. I prefer oil based stain as it just seems a little more user friendly when you wipe it on. I used a Minwax Kona for a nice dark look. Usually I would use a sanding sealer or varnish and sand in between coats for a nice smooth finish. I really didn’t want to sand the face of the mantel as it may take off some of the color so I used. Minwax Polycrlic in a satin finish. This water based finish is really different than typical finish. If flows very well and is very thin. It doesn’t raise the grain at all when you apply it. I didn’t sand the mantel at all in between coats. I applied a total of three coats.
Installing The Mantel
Installation is very easy. Cut two 2×4’s to fit into the recess in the back of the mantel. I cut mine an inch short so I could fine tune the position. Mount the first 2×4 on the wall keeping in mind the mantel will sit about an1-1/2” higher than the 2×4. Make sure you hit at least a couple of studs and that your screws are long enough to get through the 2x and drywall and any ship lap you may have and get into the studs an inch. If you are mounting to brick, click here for info on how to mount your 2x to brick. Now I would add the second 2x on top of the second but only use a couple of screws. Now place the mantel on the 2×4’ and check for level. I had to adjust mine a touch. I then slid the mantel off and added a few more screws. After that I set the mantel in place and added a few screws from the top. Install the decorative nuts if you haven’t as yet.
Final Thoughts On The Project
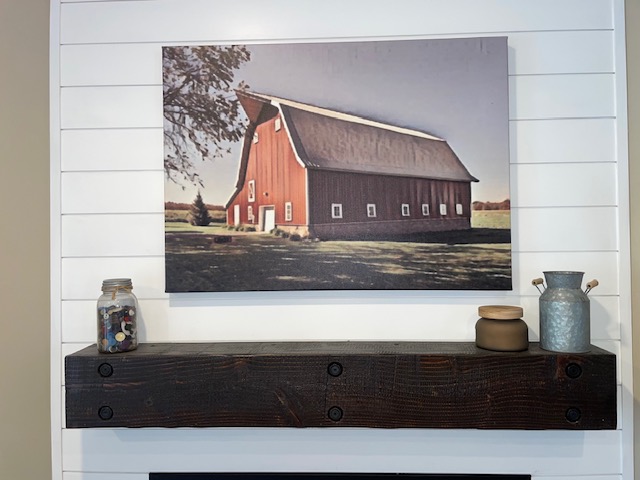
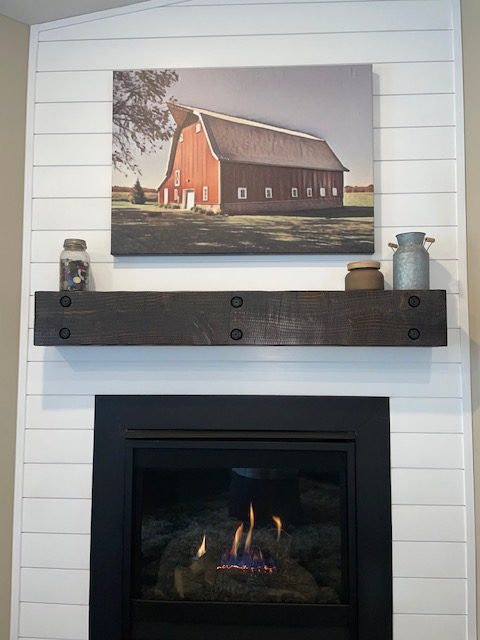
This is a project that really turned out as I had hoped. It was truly fun to build and really stands out. My wife added the canvas print (that is something for another blog) as well as couple basic pieces to finish the look. I hope you get inspired to build your own fireplace mantel. All DIY projects should be this easy!
